Add a Service
A service links a client to a package - and, for an internet plan, to the router that authenticates them. Set the plan, dates and authorization, or pick a TV, voice or other package and skip the network side entirely.
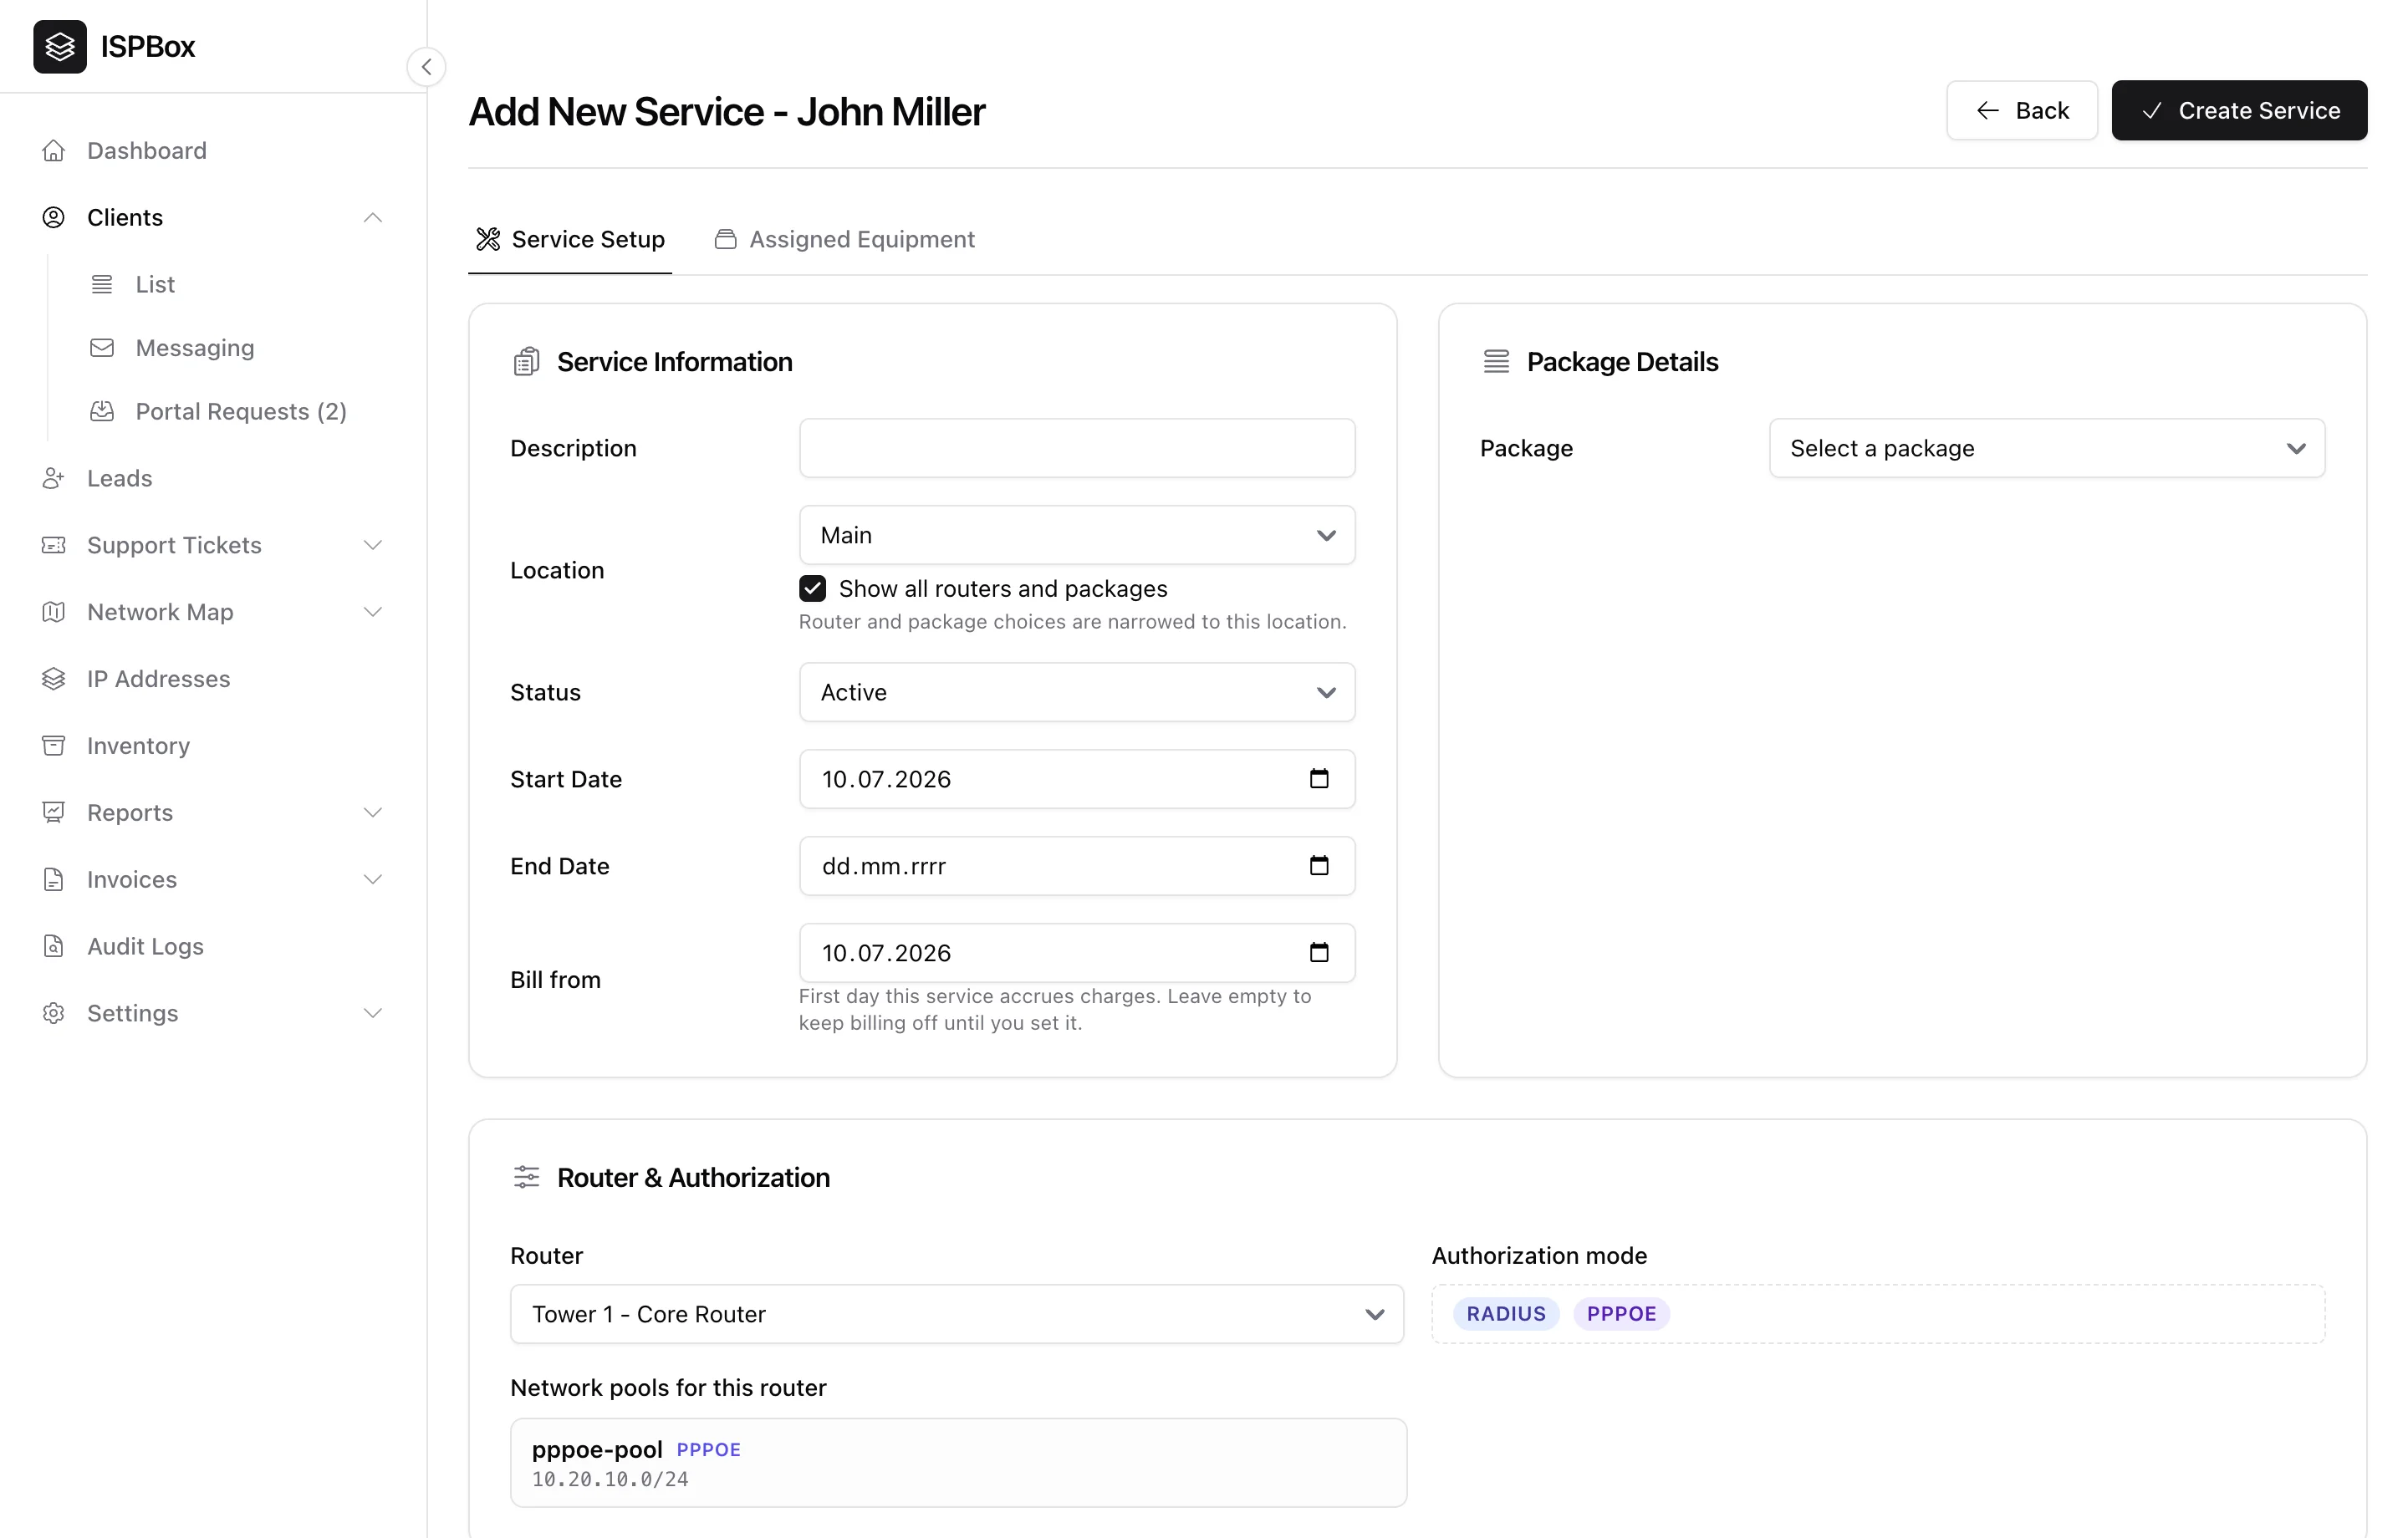
A service is a customer's active subscription - the link between a client, a package and the router that authenticates them. It is what gets billed and what pushes the speed limit to your network. Add one from a client's profile (Services > Add), which needs the services manage permission.
1. Service information
Give the service a description, pick its location, and set its status (Active, and so on). Set the start date and the bill-from date - the first day the service accrues charges (leave it empty to keep billing off until you are ready). The location narrows the router and package choices to that area; tick Show all routers and packages to see everything.
2. Package
Choose the package the customer is subscribed to. This sets their monthly charge and the download/upload speeds ISPBox enforces on the network. (If none are listed, create a package first.)
3. Router & authorization
This card is only shown for a service on an Internet package - see section 5 for the rest. Pick the router that will serve this customer. ISPBox shows the authorization mode it supports (for example RADIUS / PPPoE) and the network pools configured on it. Depending on the mode you provide the customer's login or IP/MAC, and ISPBox provisions the authentication (RADIUS entry or MikroTik secret) automatically when you save.
The IP address is picked for you: the moment you choose the router, the field fills with the first free address of that router's client pool and says so underneath ("assigned automatically from the Clients pool"). Type another address or pick one from the suggestions if you need a specific one - a typed address is never overwritten, even if you change the router again. On Edit Service the same happens only when you move the service to another router; an existing address is left alone.
4. Services without a network side
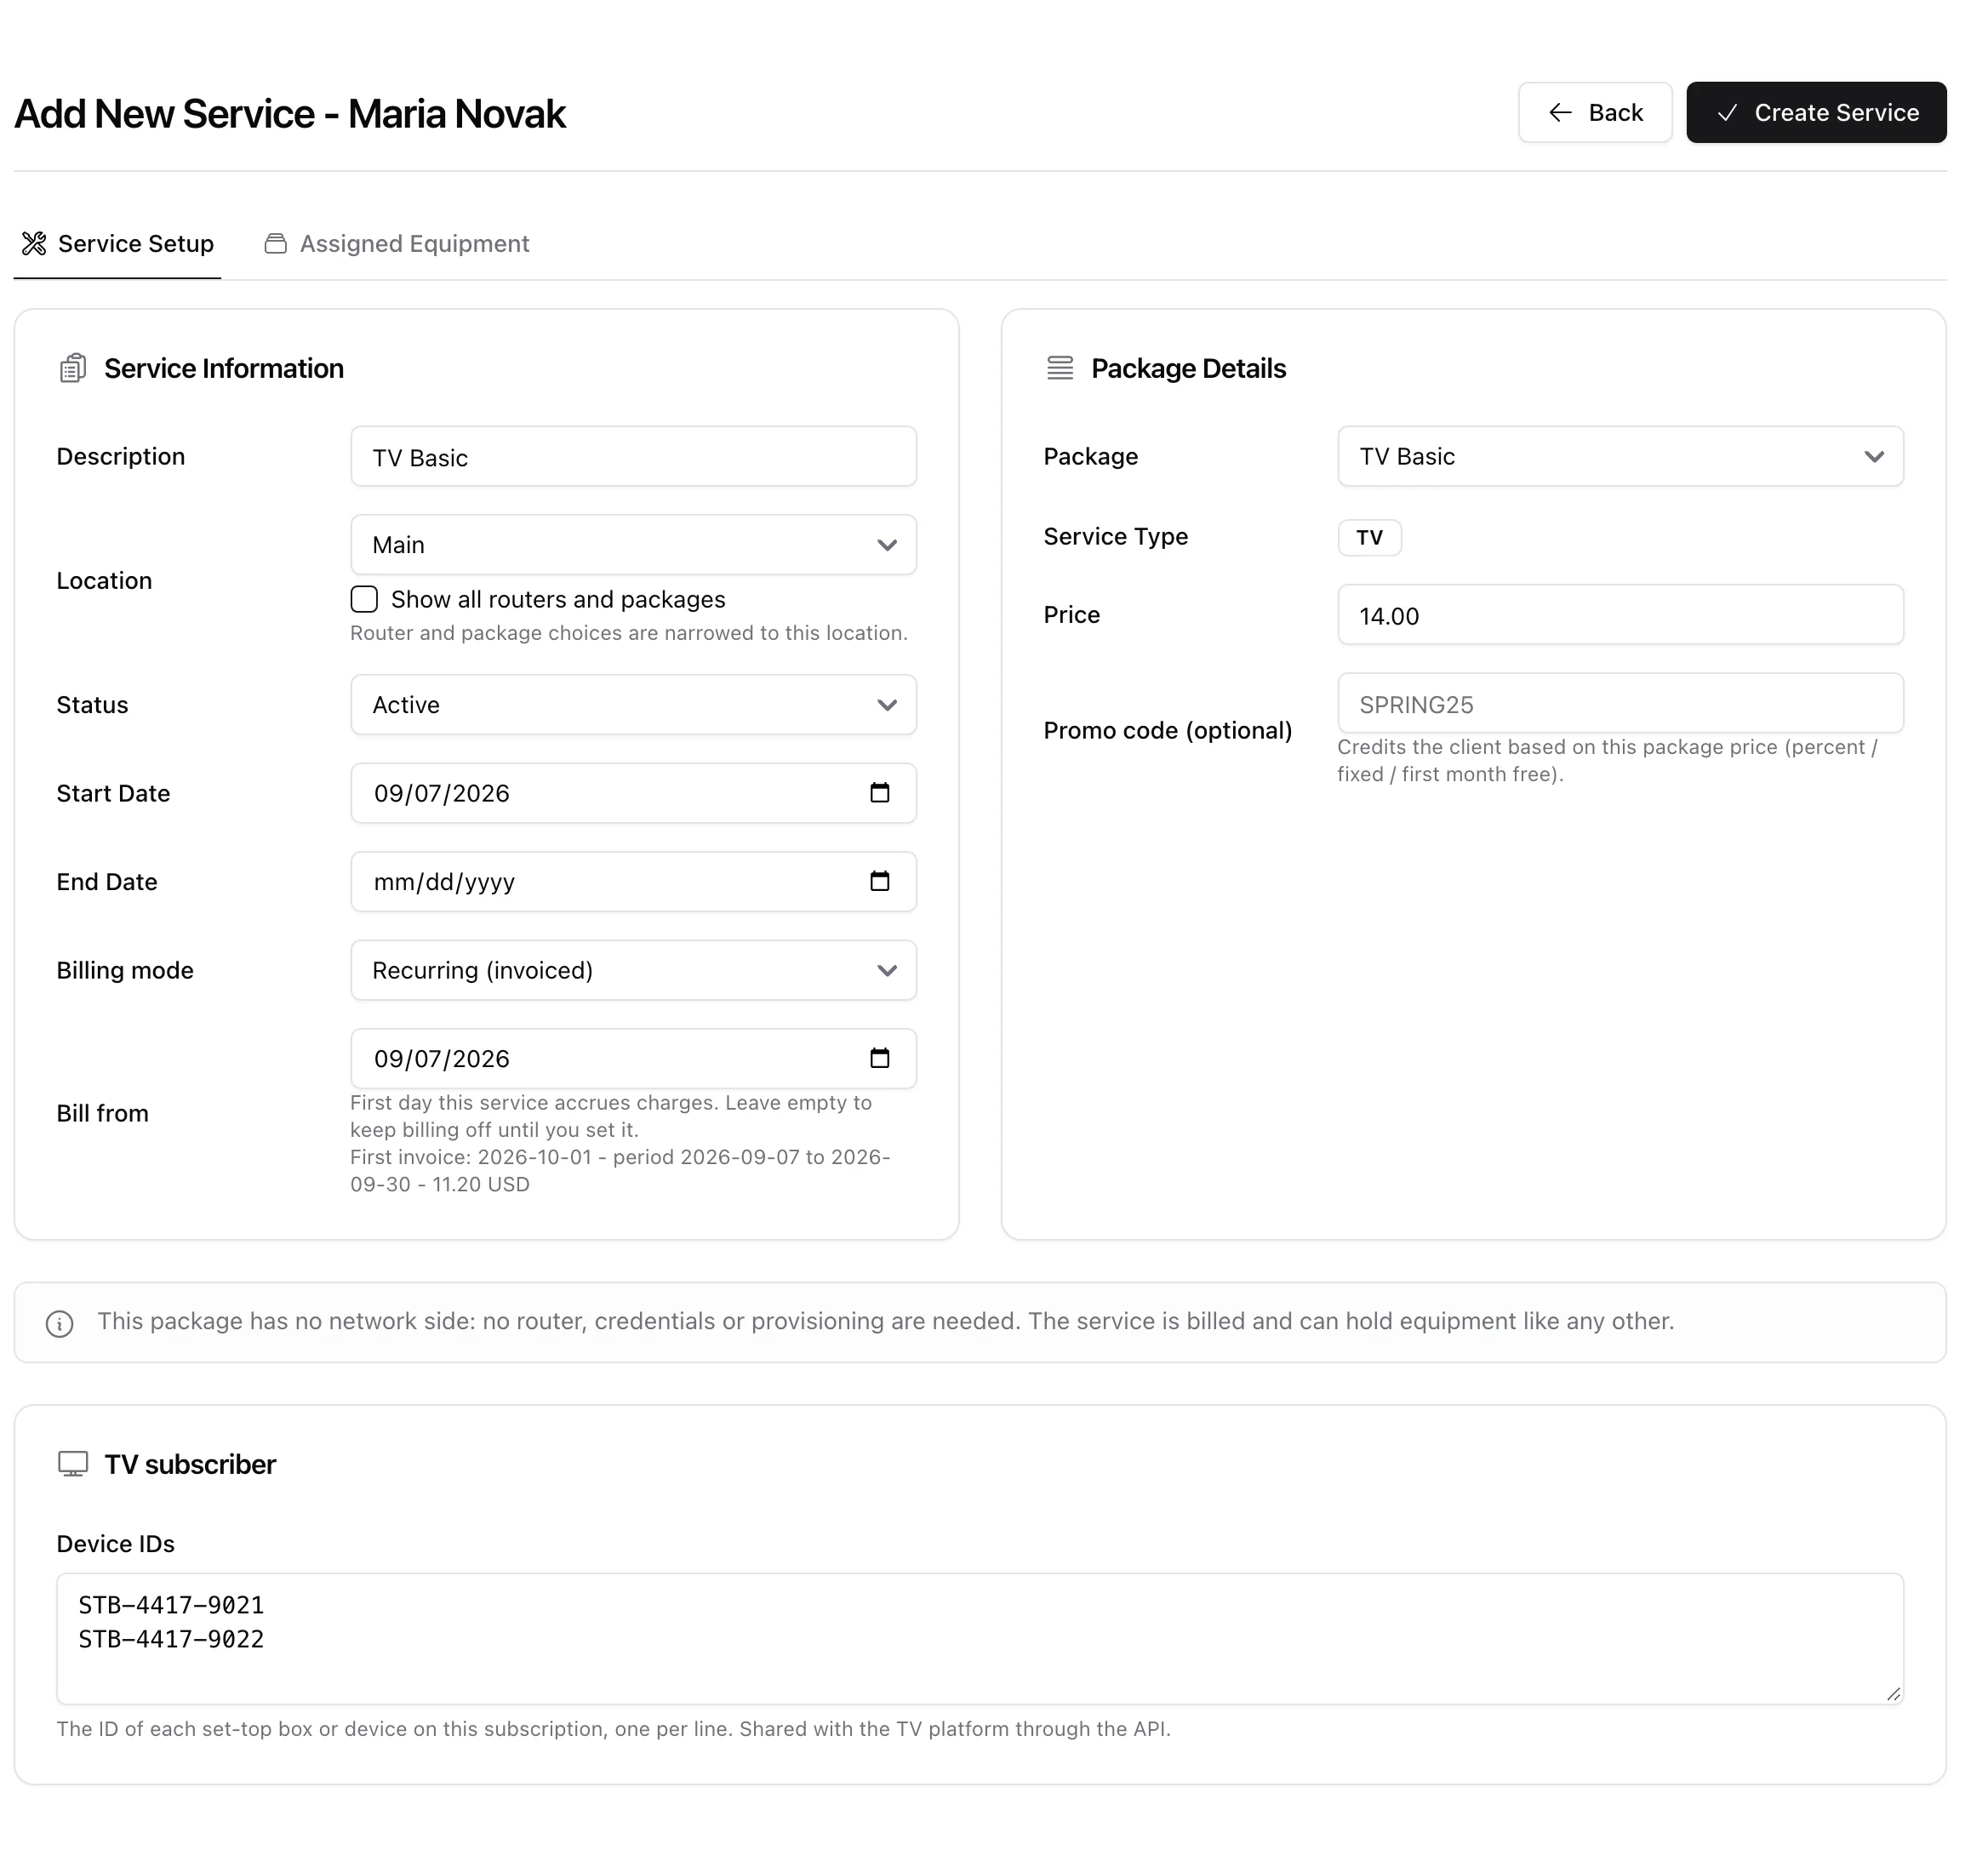
Pick a TV, voice or other package and the form changes shape. The Router & Authorization and Authentication Details cards disappear, along with the Activity tab, and a note takes their place: "This package has no network side: no router, credentials or provisioning are needed. The service is billed and can hold equipment like any other." A router is not required, nothing is written to RADIUS or pushed to MikroTik, and FreeRADIUS is not reloaded.
A TV package instead shows a TV subscriber card asking for whatever its identification mode needs - a login and password, or one device ID per set-top box. Switching an existing internet service to such a package removes it from the router and RADIUS first and drops its credentials; switching back restores the router. The whole story, including selling a TV pack as an add-on on an internet service, is in TV and Add-on Services.
5. Assigned equipment
The Assigned Equipment tab is where you store the customer's Wi-Fi and CPE credentials (SSID, passwords, CPE login) - see Customer Equipment. Click Create Service to activate it.