Microsoft 365 Email Setup
Send ISPBox mail from your own Microsoft 365 mailbox via the Graph API. Create an Azure app registration, paste the client ID, secret and tenant ID, and connect the mailbox over OAuth.
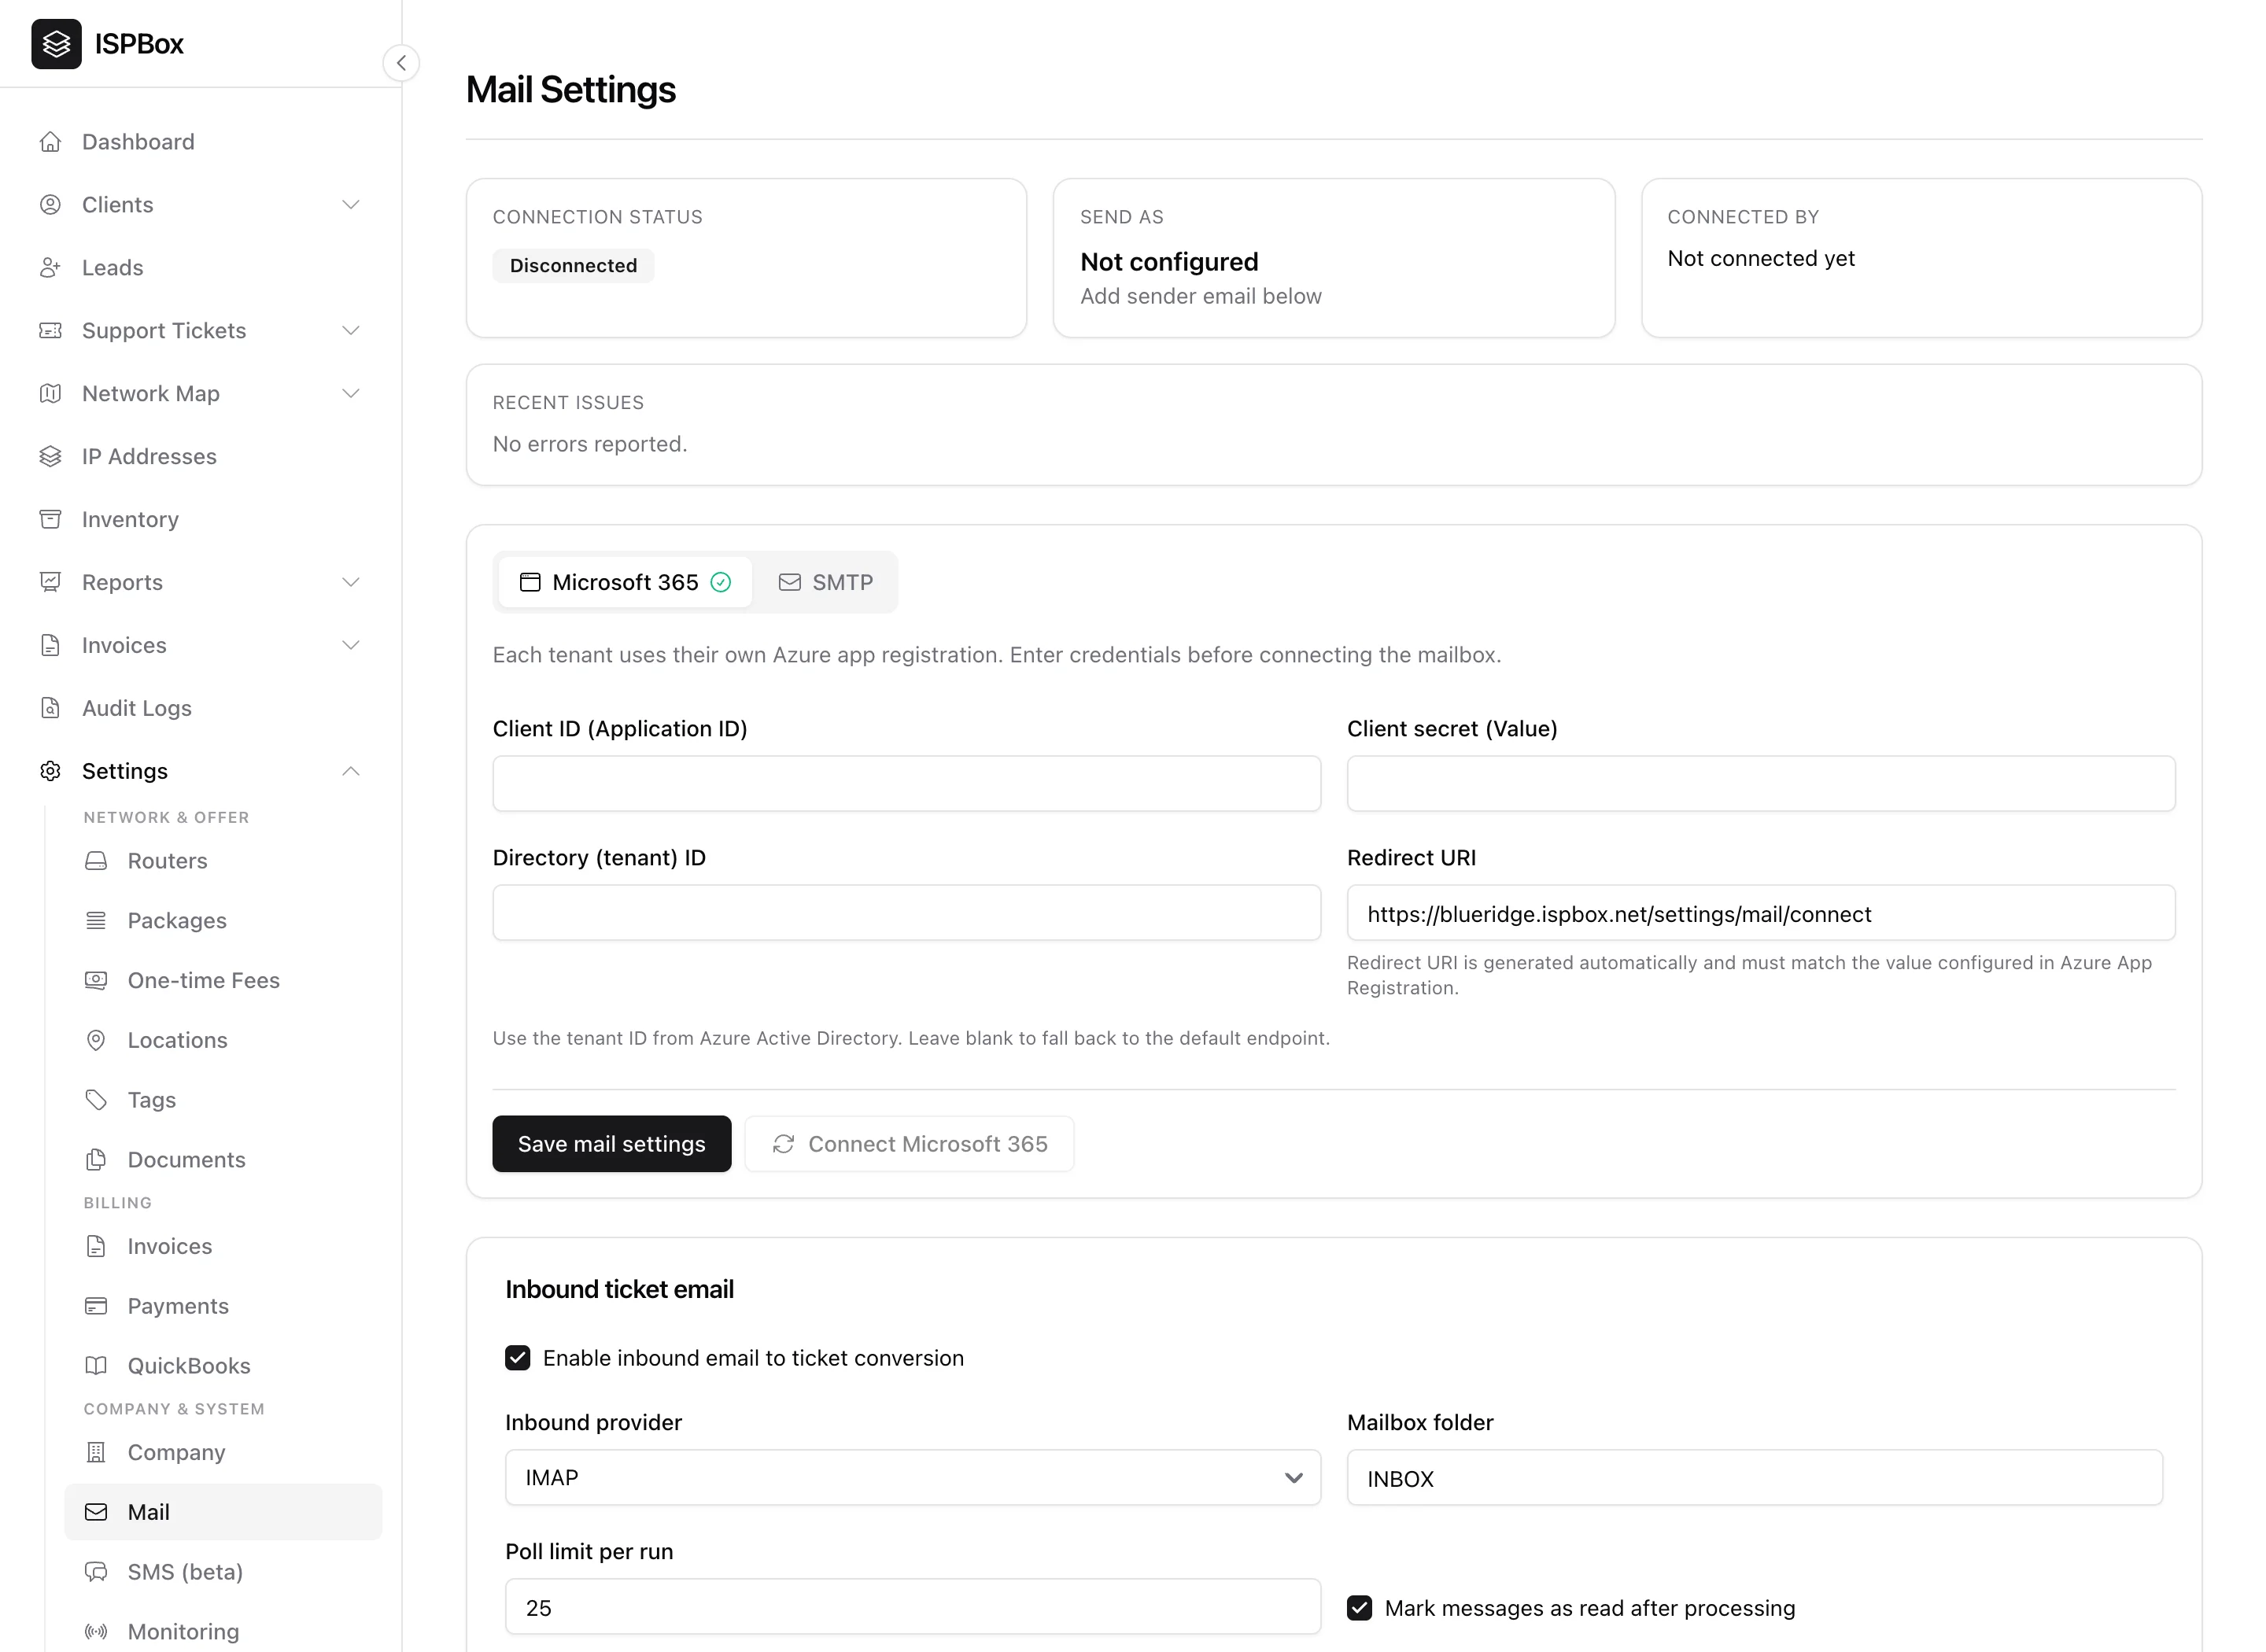
Connecting Microsoft 365 lets ISPBox send your invoices, receipts and notifications from your own Microsoft mailbox using the modern Graph API - no app passwords, and mail lands with your domain's reputation. Each tenant uses its own Azure app registration. Set it up under Settings > Mail, on the Microsoft 365 tab (needs settings manage).
1. Create an Azure app registration
In the Azure Portal (portal.azure.com), under Azure Active Directory > App registrations, create a new registration:
- Add a Redirect URI of type Web - copy the exact value ISPBox shows in the Redirect URI field (it is generated automatically and must match).
- Under Certificates & secrets, create a client secret and copy its Value immediately.
- Under API permissions, grant the Microsoft Graph mail-send permission your organisation requires and admin-consent it.
From the app's Overview page you get the Application (client) ID and the Directory (tenant) ID.
2. Enter the credentials in ISPBox
On the Microsoft 365 tab, paste:
- Client ID (Application ID)
- Client secret (Value)
- Directory (tenant) ID - from Azure AD (leave blank to use the default endpoint)
Click Save mail settings. The page's top cards show your connection status, the send-as address and any recent issues.
3. Connect the mailbox
Click Connect Microsoft 365 and sign in with the mailbox account you want ISPBox to send from - this authorises ISPBox over OAuth. Once connected, the status flips to connected and ISPBox sends all outbound mail (invoices, receipts, ticket replies, mass messages) through Microsoft 365.
Prefer a plain mail server? Use SMTP instead. To also turn incoming email into tickets, see Email to Ticket.