Support Tickets
Track every customer issue in one place, tied to the customer and their service. The ticket list and filters, working a ticket (status, priority, assignee), client context, comments and outage links.
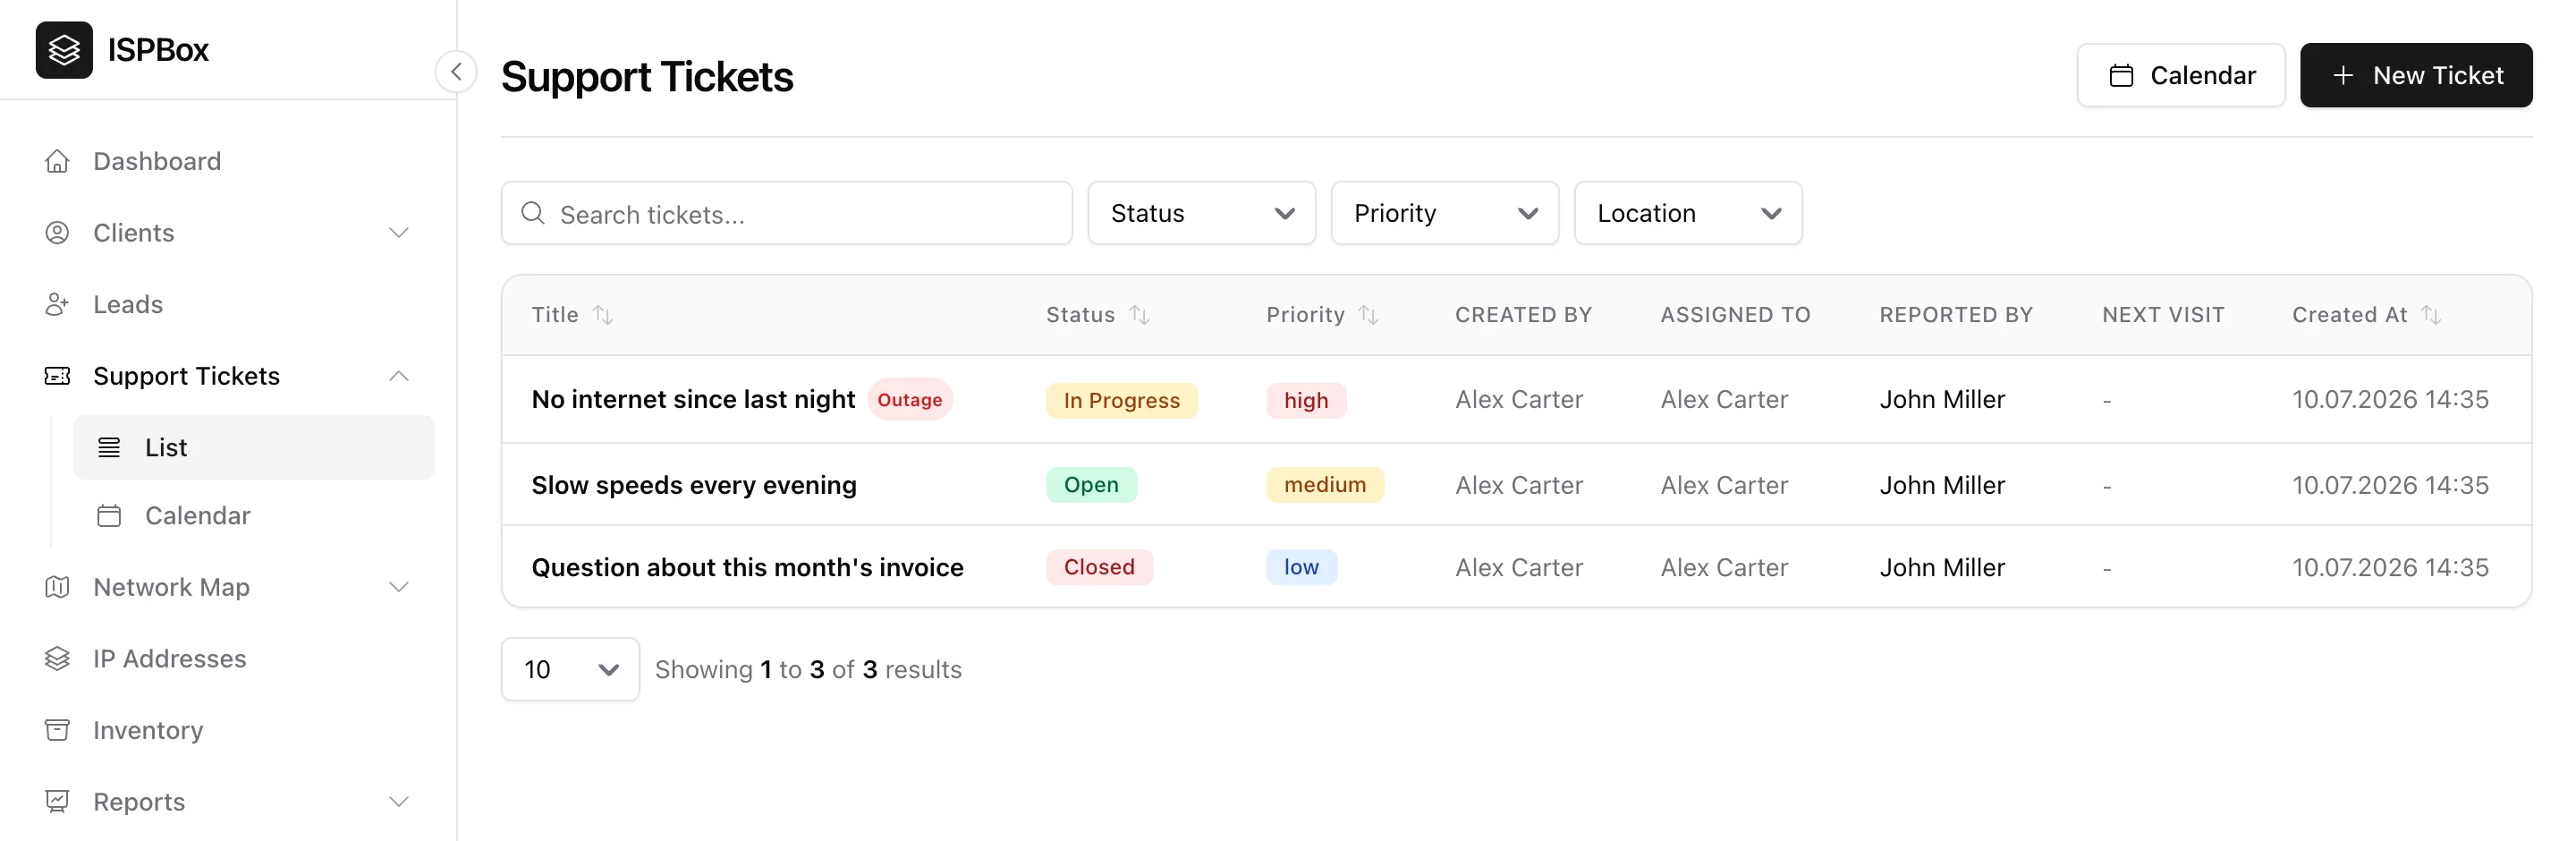
Support tickets are how ISPBox tracks every customer issue - from "no internet" to a billing question - in one place, tied to the customer and their service. This guide covers the ticket list and how to work a ticket end to end. Tickets need the tickets view permission to see and tickets manage to create or edit.
1. The ticket list
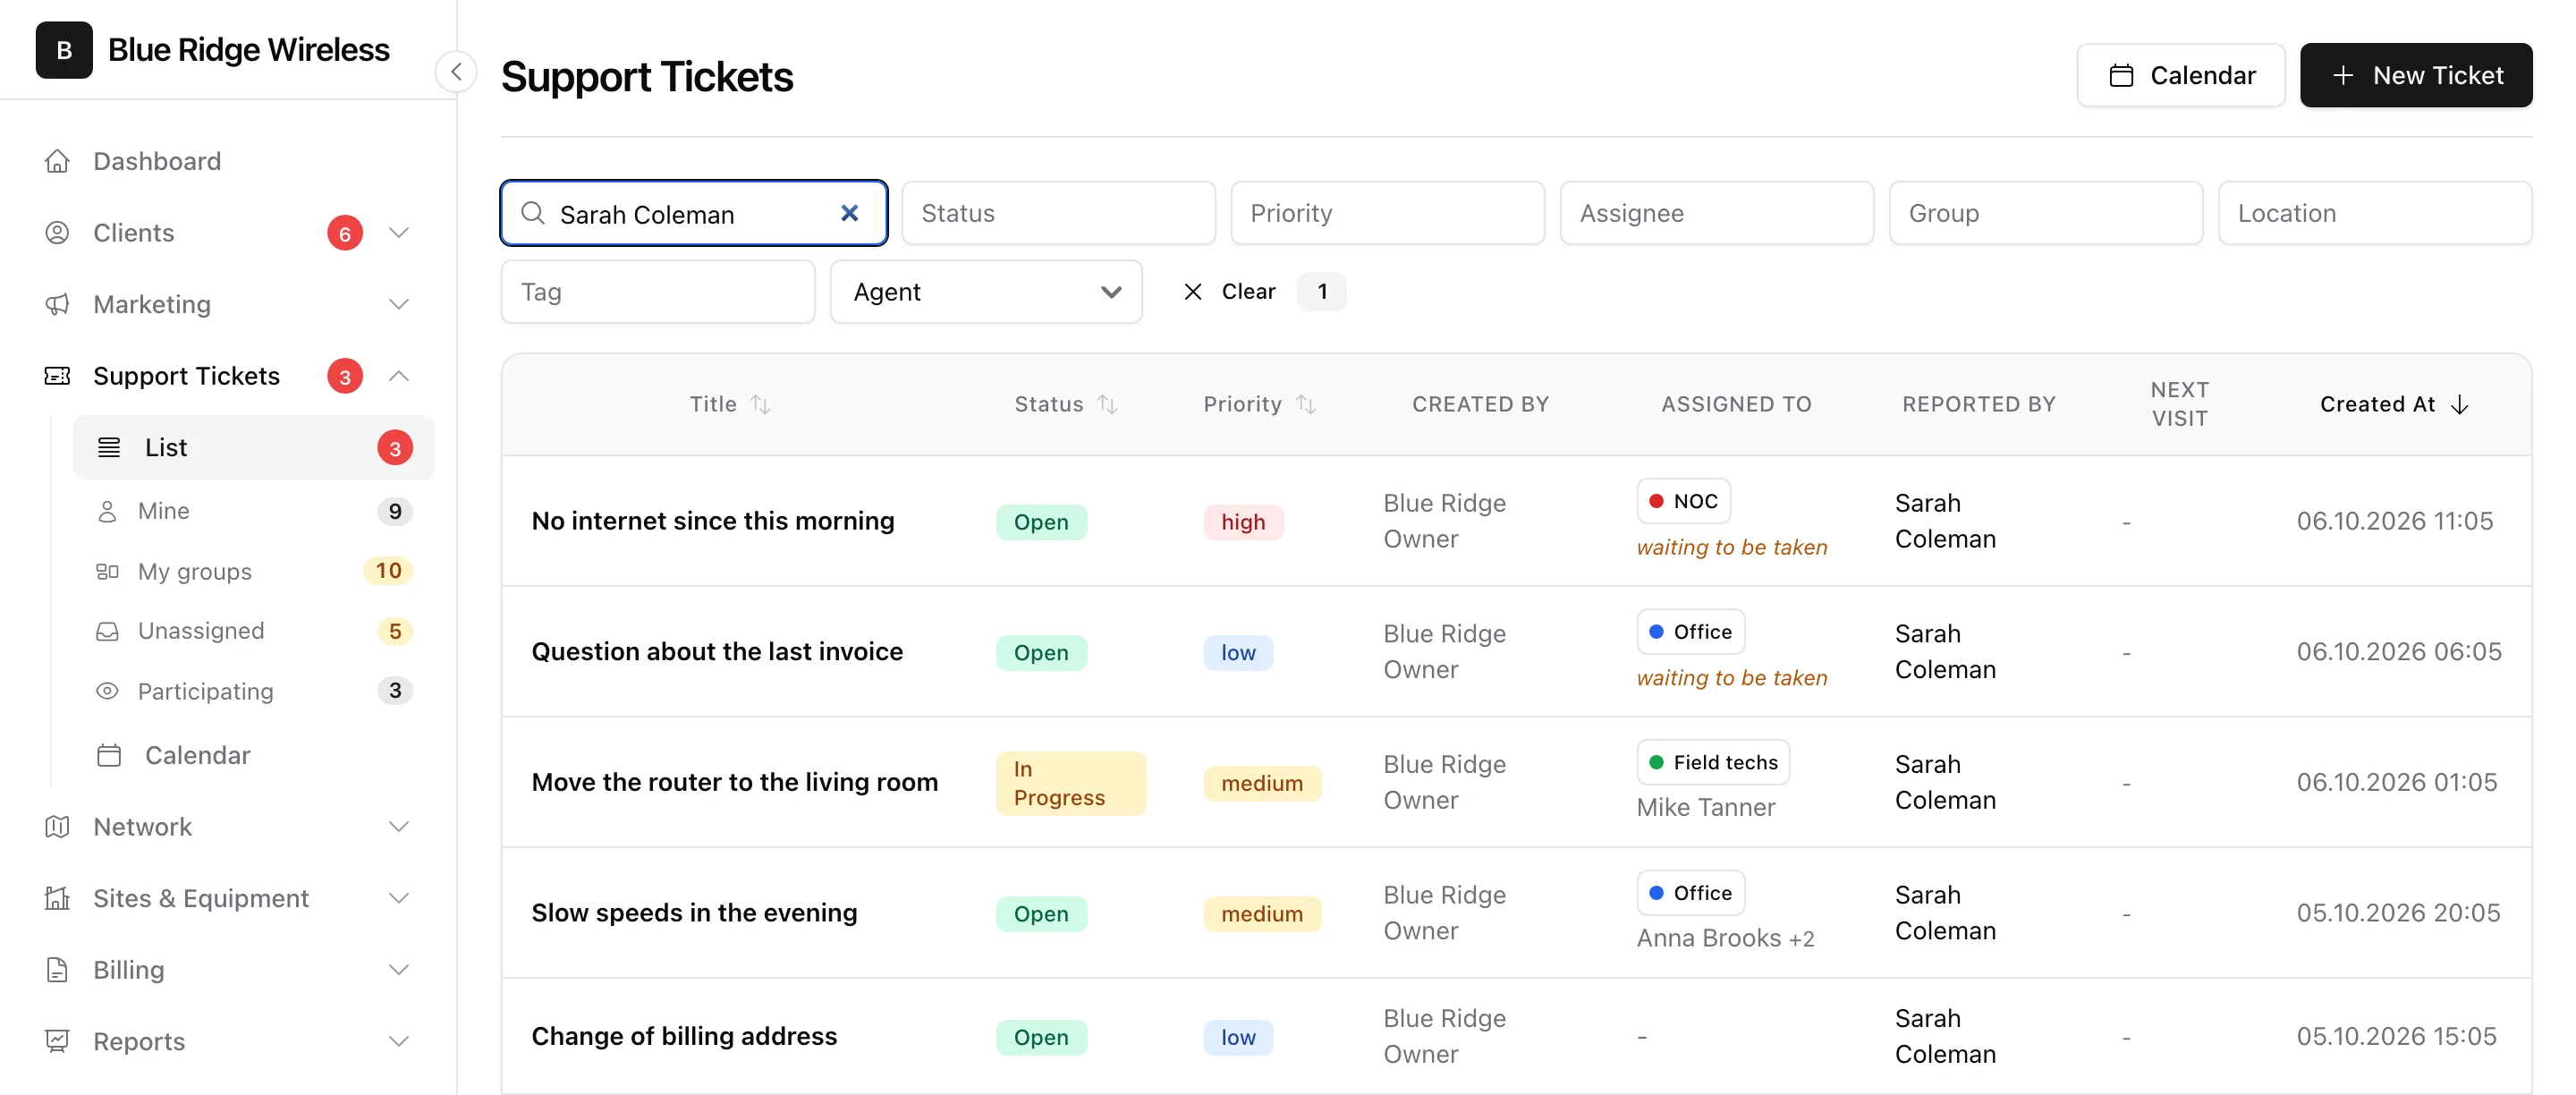
Open Support Tickets > List. Each ticket shows its title, status, priority, who created it, who it is assigned to, the customer who reported it, the next scheduled visit and when it was created. Use the search box and the Status / Priority / Assignee / Group / Location / Tag filters to narrow the list; the active filter count shows on a Clear button. Click any column header to sort. A red Outage badge marks tickets linked to a network incident.
New Ticket (top right) opens a blank ticket; you can also raise one directly from a client's profile so it is pre-linked to them.

The Add ticket form has an Attachments card: up to 5 files, 10 MB each (jpg, png, webp, pdf, csv, txt). Handy when you are filing a ticket on behalf of a customer who emailed you a photo. The files land on the ticket as its first comment, visible to the client.
2. Working a ticket
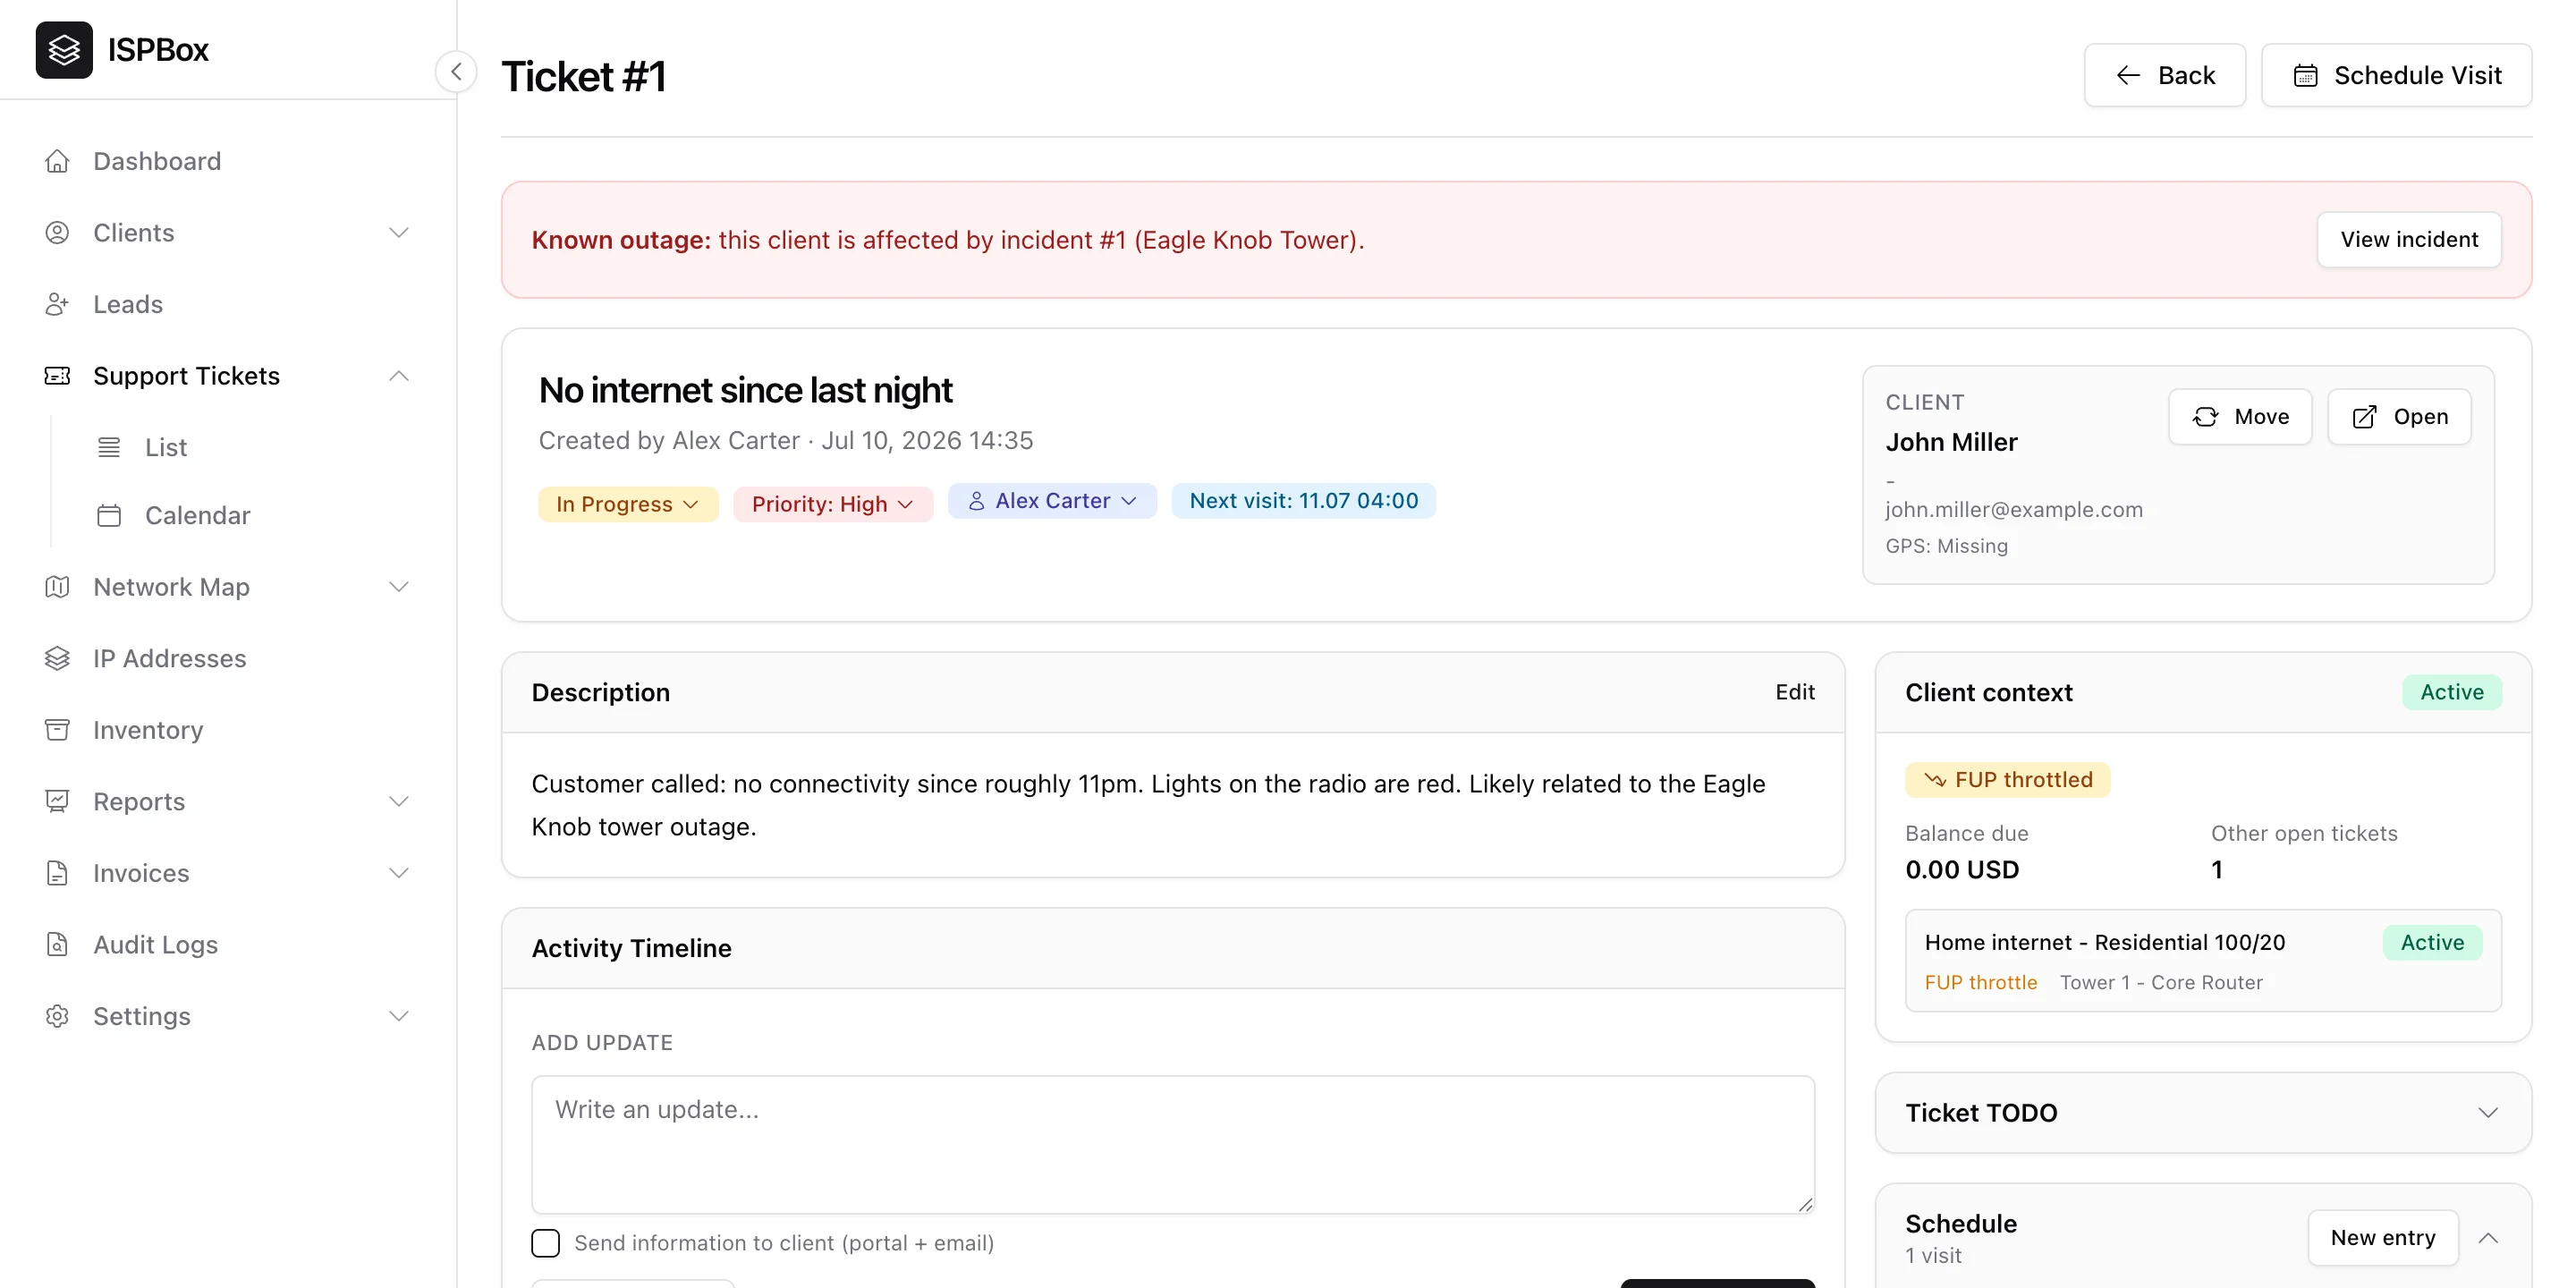
The ticket page puts everything an agent needs on one screen. The pills under the title change the ticket instantly - no separate save:
- Status - Open, In Progress or Closed. Click to change.
- Priority - low, medium or high.
- Assignee - search your staff to assign (or leave unassigned). A ticket has one owner.
- Group - the team whose queue the ticket is in. Shown once you have created groups.
- Next visit - shows the upcoming scheduled visit, if any.
On the right, the Client card links to the customer's profile and offers directions to their address, while Client context surfaces their live service state (active, FUP throttled, balance due, other open tickets) so you have the full picture without leaving the ticket. If the customer is hit by a known outage, a Known outage banner links straight to the incident - so you can tell them it is already being worked on instead of rolling a truck.
3. Comments and customer updates
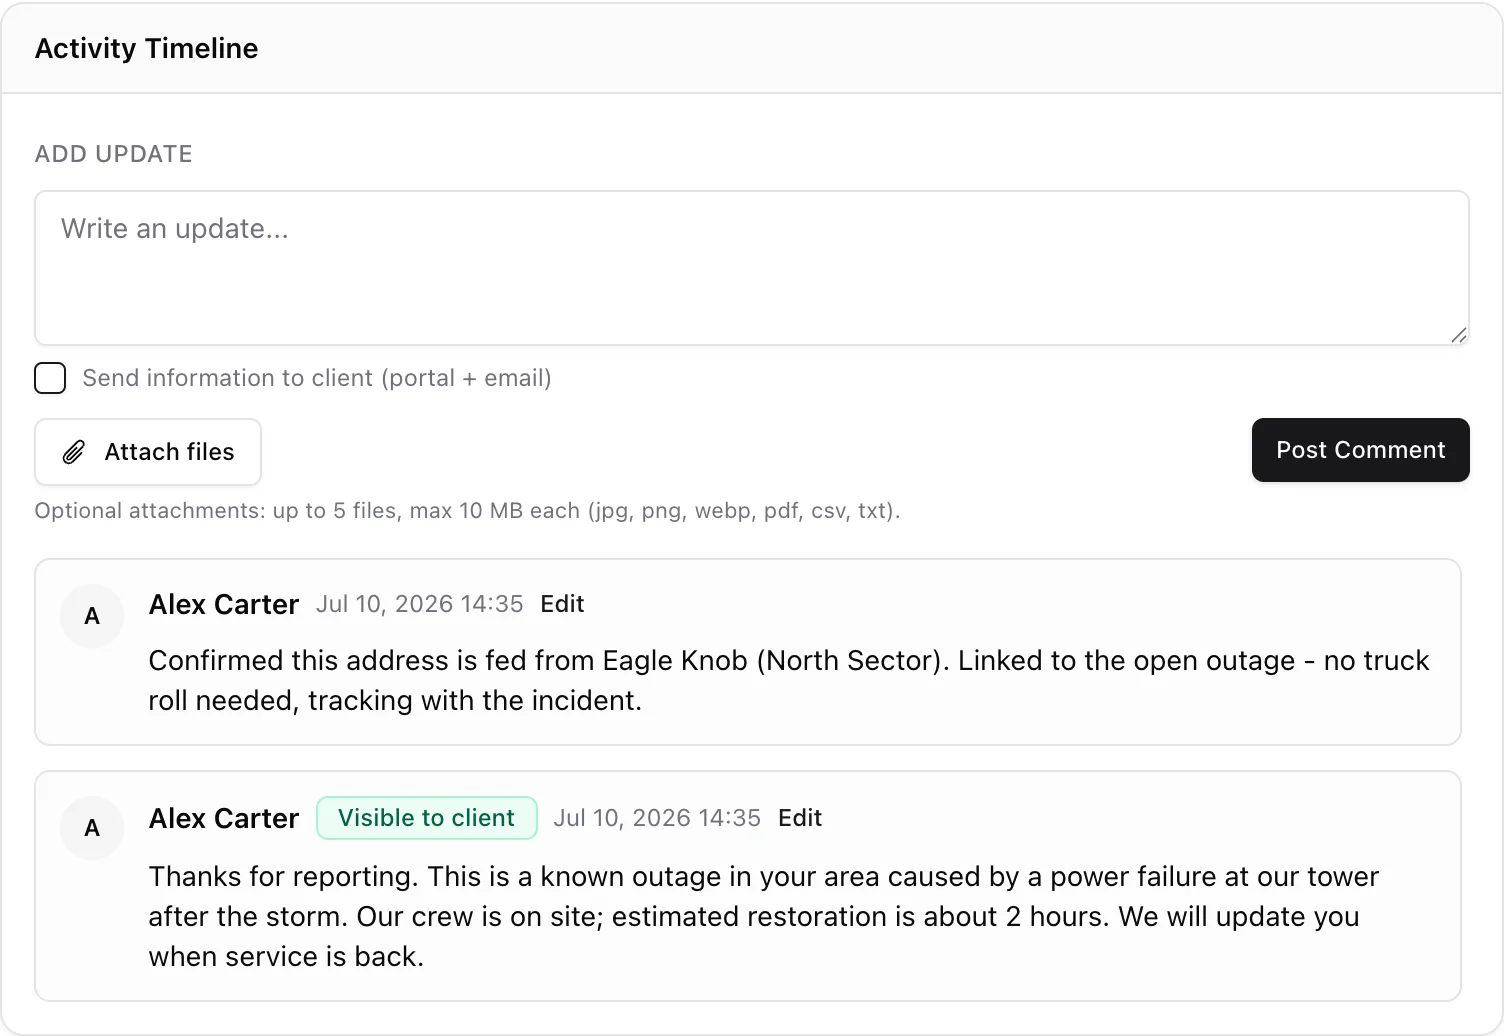
The Activity Timeline is the running record of the ticket. Post an update and choose whether it stays internal or is sent to the client - a client-visible comment appears in their customer portal and triggers an email. Client-visible comments carry a green Visible to client badge so it is obvious what the customer has seen. You can attach files (up to 5, 10 MB each) and keep a ticket checklist for multi-step jobs.
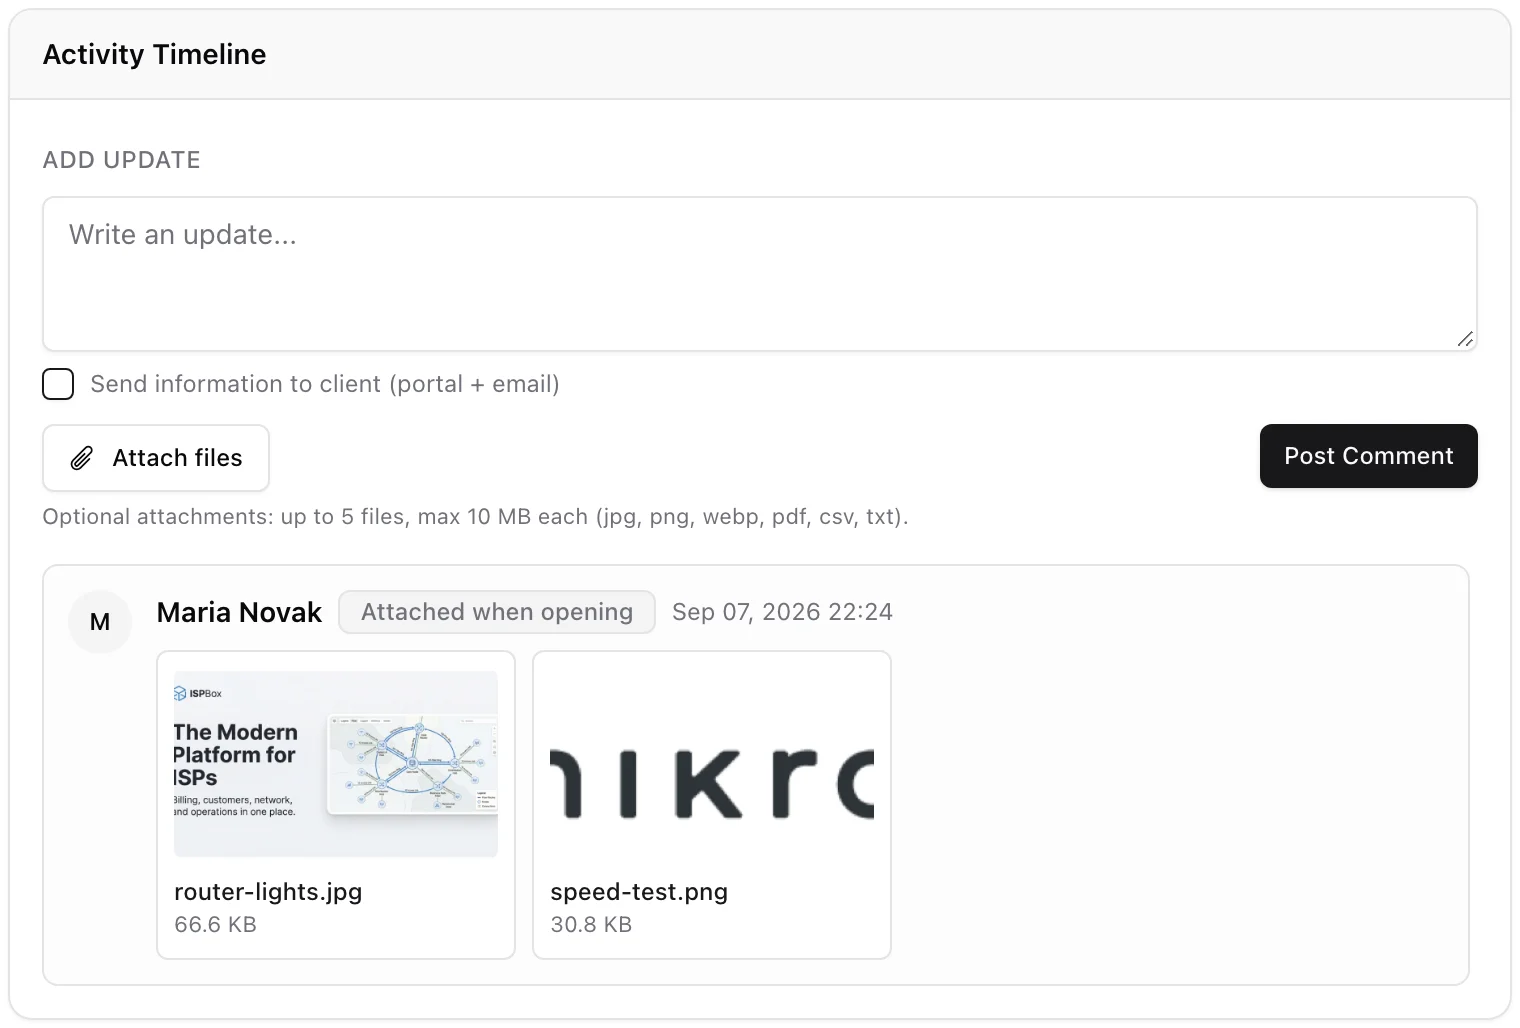
Files sent while the ticket was being opened - from the customer portal, the ISPBox mobile app, an agent, or your own Add ticket form - are not lost in a separate place. They arrive as a first comment with no text, badged Attached when opening, so the photo of the blinking router is the first thing on the timeline instead of something the customer has to be asked for.
4. Groups, taking a ticket and participants
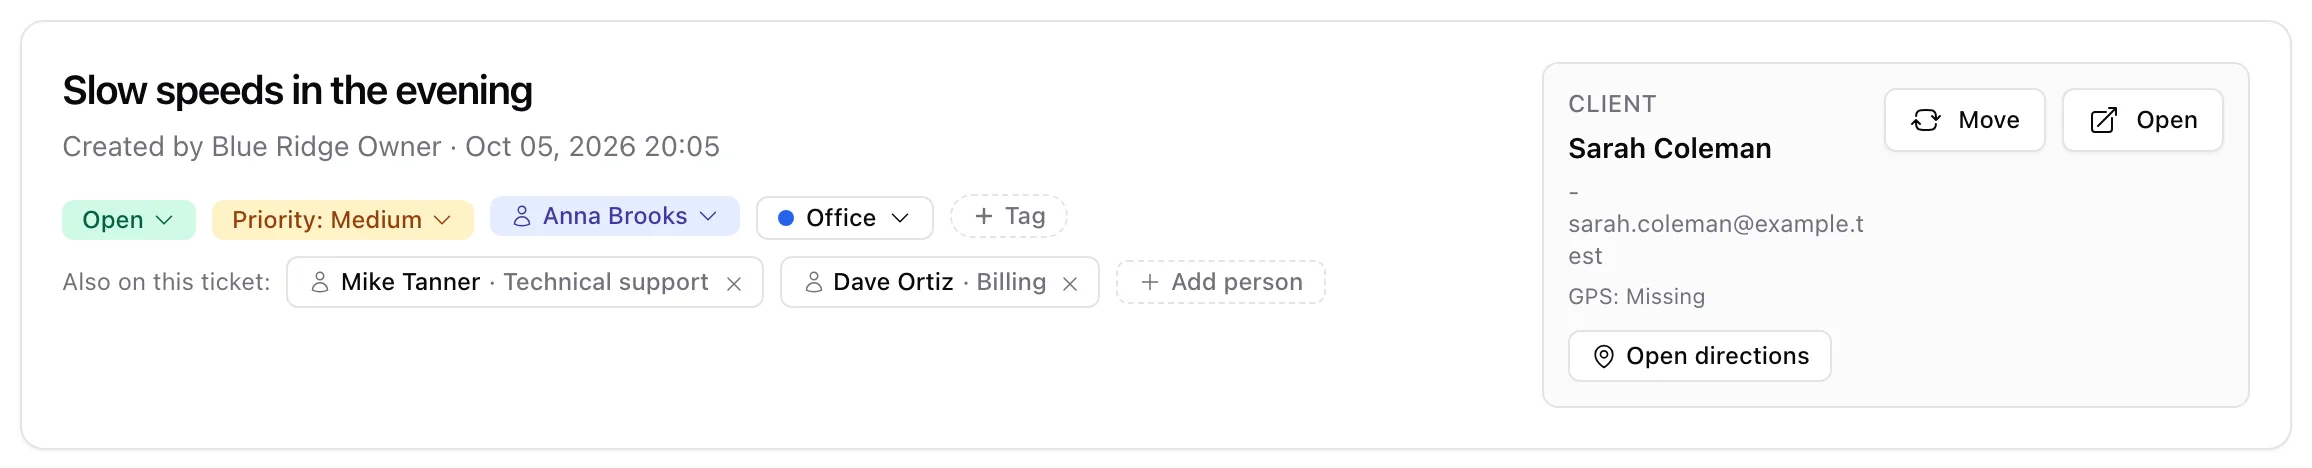
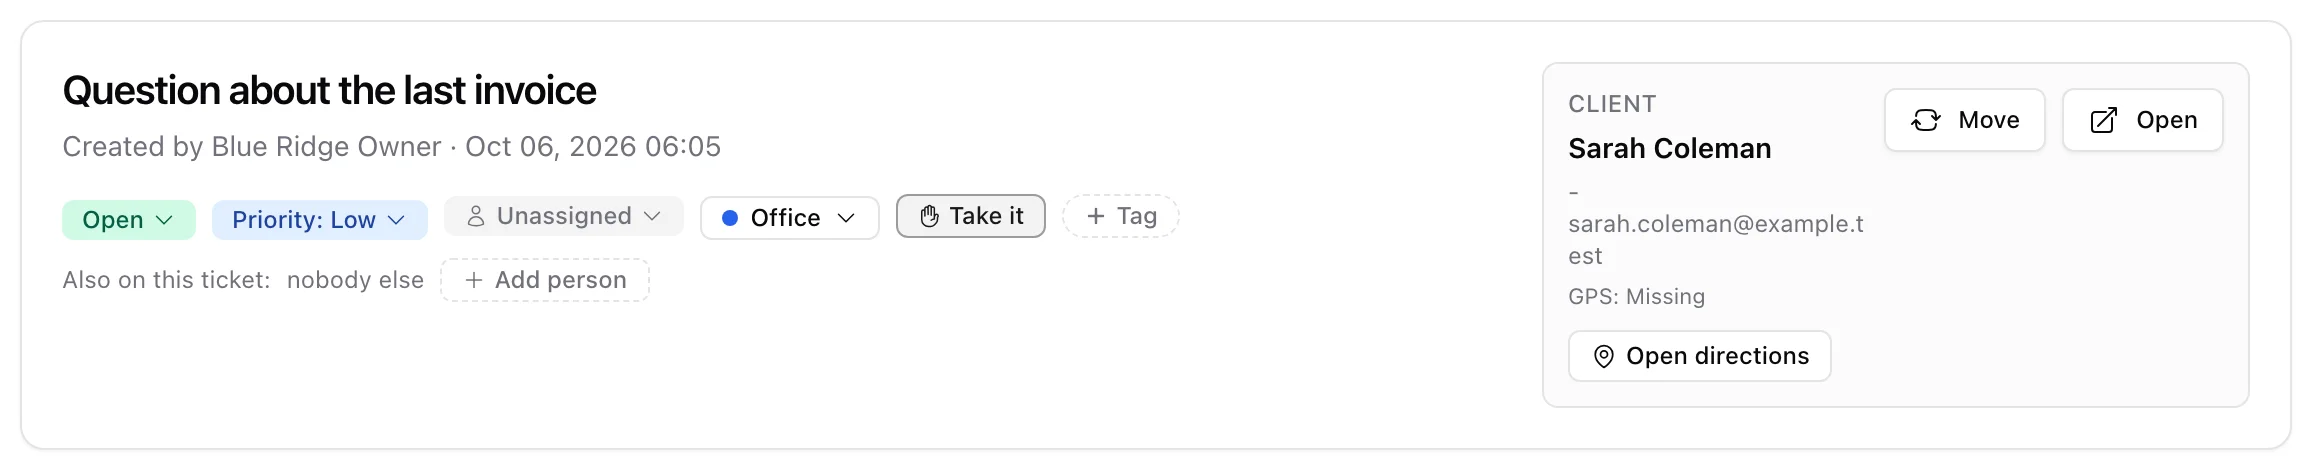
A ticket has one owner and, separately, a group: the team whose queue it sits in. That lets a ticket wait for "someone from the Office" before any one person has it. Create your teams under Settings > Users > Groups; until you do, none of this shows.
- Group pill - click it to move the ticket to another group, or to no group. If the current owner is not a member of the new group, they come off the ticket and it waits for someone from that team; the panel says so.
- Take it - shown on a ticket nobody owns. One click makes you the owner. The ticket stays in its group.
- New Ticket has a Group field next to Assigned To; a person is optional.
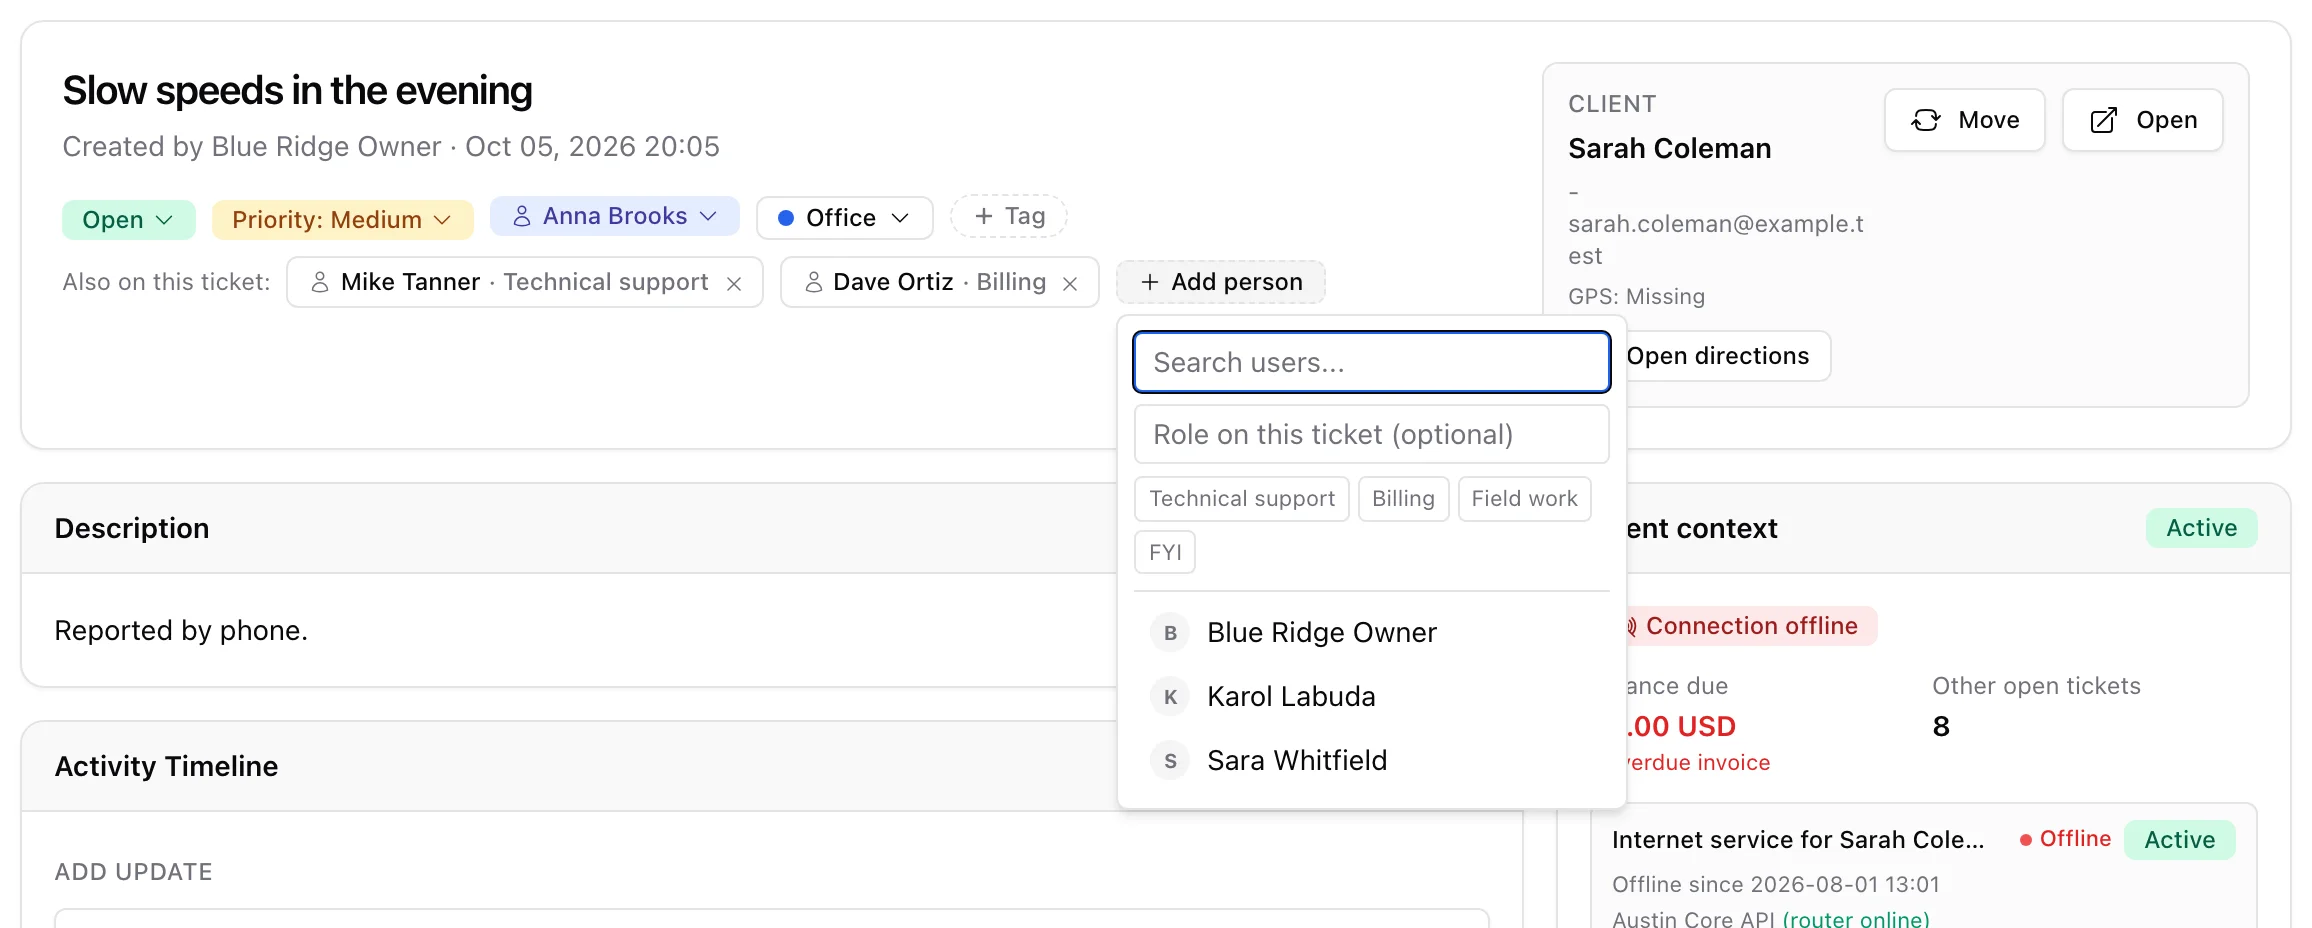
When more than one person needs to be on a ticket, add them under Also on this ticket. The owner stays one person, so it is always clear who is responsible; the others are participants. Click Add person, pick a user and, if you like, type their role on this ticket (Technical support, Billing, Field work, FYI, or your own wording). Participants get the customer's replies and find the ticket under Participating. Click a participant to change the role, or the x to take them off.
5. Your queues in the side menu
Under Support Tickets > List the side menu counts the open work that concerns you. Each line opens the list on that queue:
- Mine - open tickets assigned to you.
- My groups - open tickets waiting in a group you belong to that nobody has taken yet.
- Unassigned - open tickets with no person and no group.
- Participating - open tickets you were added to. Shown only when there are some.
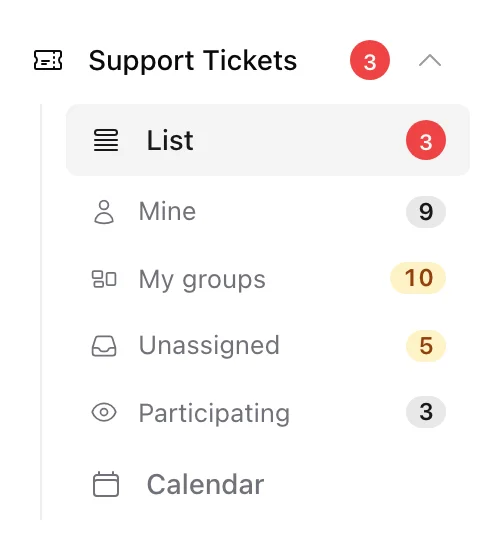
Closed tickets are never counted. While a queue is open the list shows a small chip with its name next to the filters; close it, or click List, to see every ticket again. In the list itself the Assigned To column shows the group first, then the owner, or waiting to be taken when the group has it and nobody does yet.
6. Scheduling and outages
Two things extend a ticket beyond a conversation:
- Schedule a visit - book a field appointment that shows on the team calendar.
- Outage link - tickets tied to a network incident are grouped so you can close them all when the outage clears.
Tickets can also be created automatically from customer emails - see Email to Ticket.