Router Vendors, Connection Modes and Authentication
How to add any supported router in ISPBox: choosing the vendor (MikroTik, Huawei, ZTE, Cisco, Juniper, accel-ppp, WISPr), Public IP vs WireGuard, and RADIUS vs RouterOS API authentication.
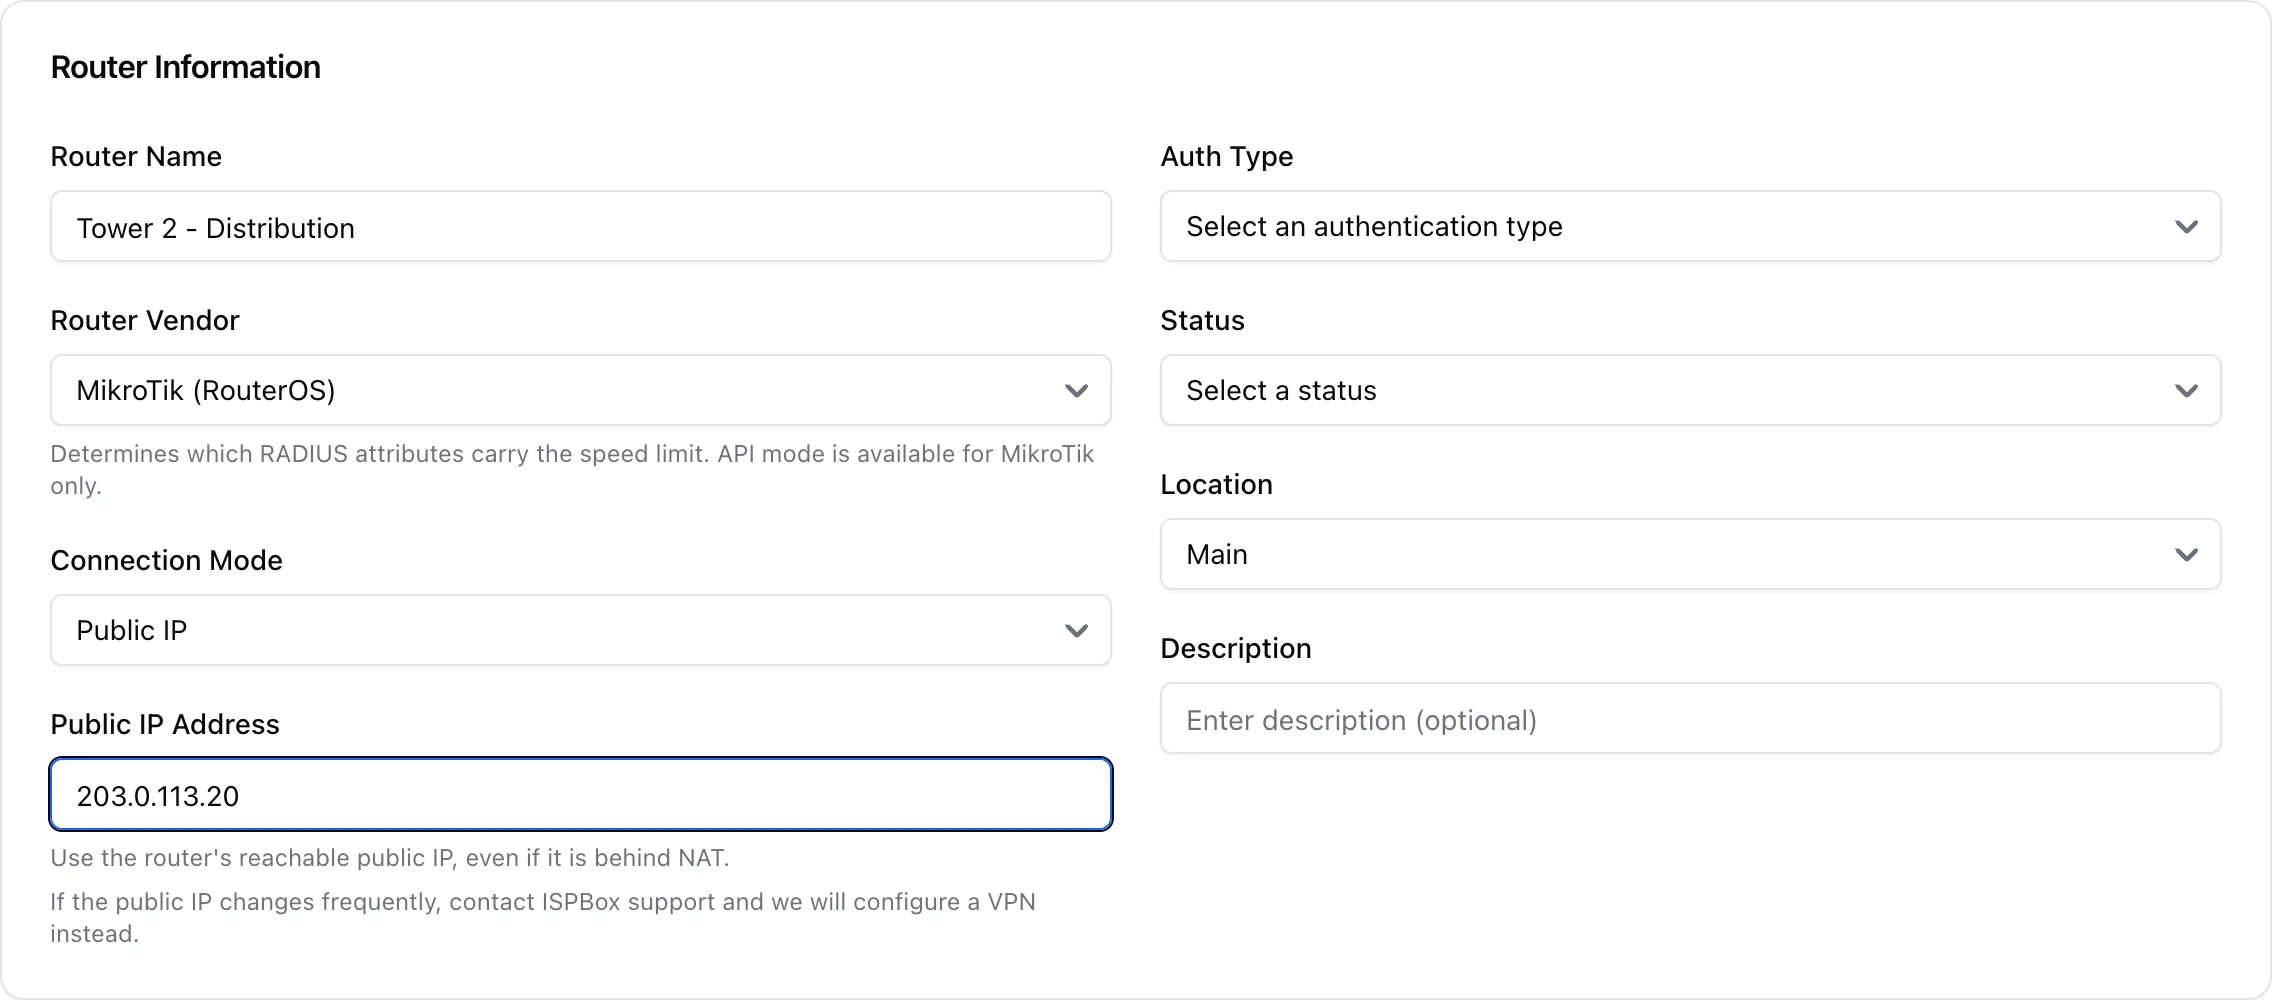
ISPBox is not MikroTik-only. When you add a router at Settings > Routers > Add Router, three choices decide how ISPBox talks to it and how it limits customer speeds: the vendor, the connection mode, and the auth type. This guide explains all three so you can add any supported router - a MikroTik, a Huawei or ZTE OLT/BNG, a Cisco or Juniper edge router, a Linux accel-ppp BNG, or any WISPr-capable gear - over a public IP or a WireGuard tunnel.
1. The three choices that define a router
- Router Vendor - which RADIUS attributes ISPBox uses to send the speed limit. Different vendors speak different attributes.
- Connection Mode - how ISPBox and the router reach each other: over a Public IP, or through a WireGuard Tunnel ISPBox provisions for you.
- Auth Type - how customers are authenticated: RADIUS (every vendor) or RouterOS API (MikroTik only).
Vendor and connection mode are independent - for example a Cisco BNG over a public IP, or a MikroTik over WireGuard.
2. Router Vendor - multi-vendor speed limits
The vendor you pick determines the RADIUS reply attributes that carry each service's speed. ISPBox ships profiles for:
- MikroTik (RouterOS)
- accel-ppp (Linux BNG)
- Huawei
- ZTE
- Cisco (IOS / IOS-XE / IOS-XR BNG)
- Juniper (MX / ERX)
- Generic (WISPr) - for any device that understands the standard WISPr rate-limit attributes (many wireless APs and BNGs, e.g. WISPr-capable Cambium/Ubiquiti gear).
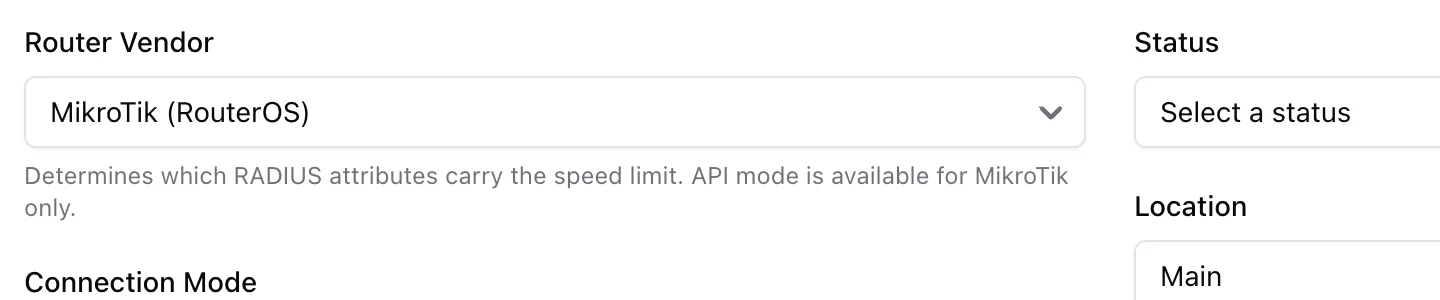
There are two families:
- Numeric vendors (MikroTik, accel-ppp, Huawei, ZTE, Generic WISPr) - ISPBox sends the speed value directly in the vendor's rate attribute. Nothing extra to configure.
- Policy vendors (Cisco, Juniper) - these apply speed through a named QoS policy that already exists on the router, so you provide policy-name templates instead (see section 6).
Note the help text under the field: API mode is available for MikroTik only. Every other vendor is driven purely over RADIUS.
3. Connection Mode - Public IP or WireGuard
Public IP - use this when the router has a reachable public IP. For RADIUS routers that IP is what ISPBox's RADIUS server expects requests from (and sends CoA to); for MikroTik API routers it is where ISPBox connects to RouterOS.
- Enter the router's real reachable public IP, even if the router is behind NAT (use the upstream/WAN address that reaches it).
- The IP should be stable. If it changes often, use WireGuard instead.
- Each router needs a unique public IP - ISPBox rejects a second router that reuses an existing RADIUS client IP.
WireGuard Tunnel - use this when the router has no stable public IP. ISPBox can generate the keys and assign a /24, then show you the full config to paste onto the router - or you can bring your own router public key. This is the recommended setup when a public IP is not available. Full walk-through: How to add a router with WireGuard + API (MikroTik).
4. Auth Type - RADIUS everywhere, API on MikroTik
RADIUS (available for every vendor) - the router authenticates each PPPoE or DHCP session against the ISPBox RADIUS server. When you save, ISPBox registers the router as a RADIUS client (NAS) using its public or WireGuard IP, and you set a matching RADIUS shared secret on both sides. Choose the PPPoE or DHCP RADIUS auth type that matches how your router hands out access.
RouterOS API (MikroTik only) - instead of RADIUS, ISPBox connects to the RouterOS API and manages queues and PPPoE secrets directly. It needs the API port (default 8728) and an API username and password. That user must belong to a RouterOS group with the read, write, policy and api policies - the built-in full group, or a dedicated group created with /user group add name=ispbox policy=read,write,policy,api. A read-only user makes every change fail with "not enough permissions". When you pick a non-MikroTik vendor, the API auth types are hidden automatically and only RADIUS options remain.
5. Walk-through: a Public IP + RADIUS router (any vendor)
This is the vendor-neutral path that works for MikroTik, Huawei, ZTE, accel-ppp, Cisco, Juniper and WISPr gear alike:
- Router Name - your internal label (for example "Tower 2 - Distribution").
- Router Vendor - pick the platform so the correct speed attributes are used.
- Connection Mode - Public IP.
- Public IP Address - the router's reachable public IP.
- Auth Type - a RADIUS type (PPPoE or DHCP). This reveals the RADIUS fields below.
- RADIUS Secret - set a shared secret; you will configure the exact same secret on the router.
- Dynamic authorization (RADIUS CoA) - leave on if the router accepts CoA (see section 7).
- Status - Active. Location - optional. Then Add Router.
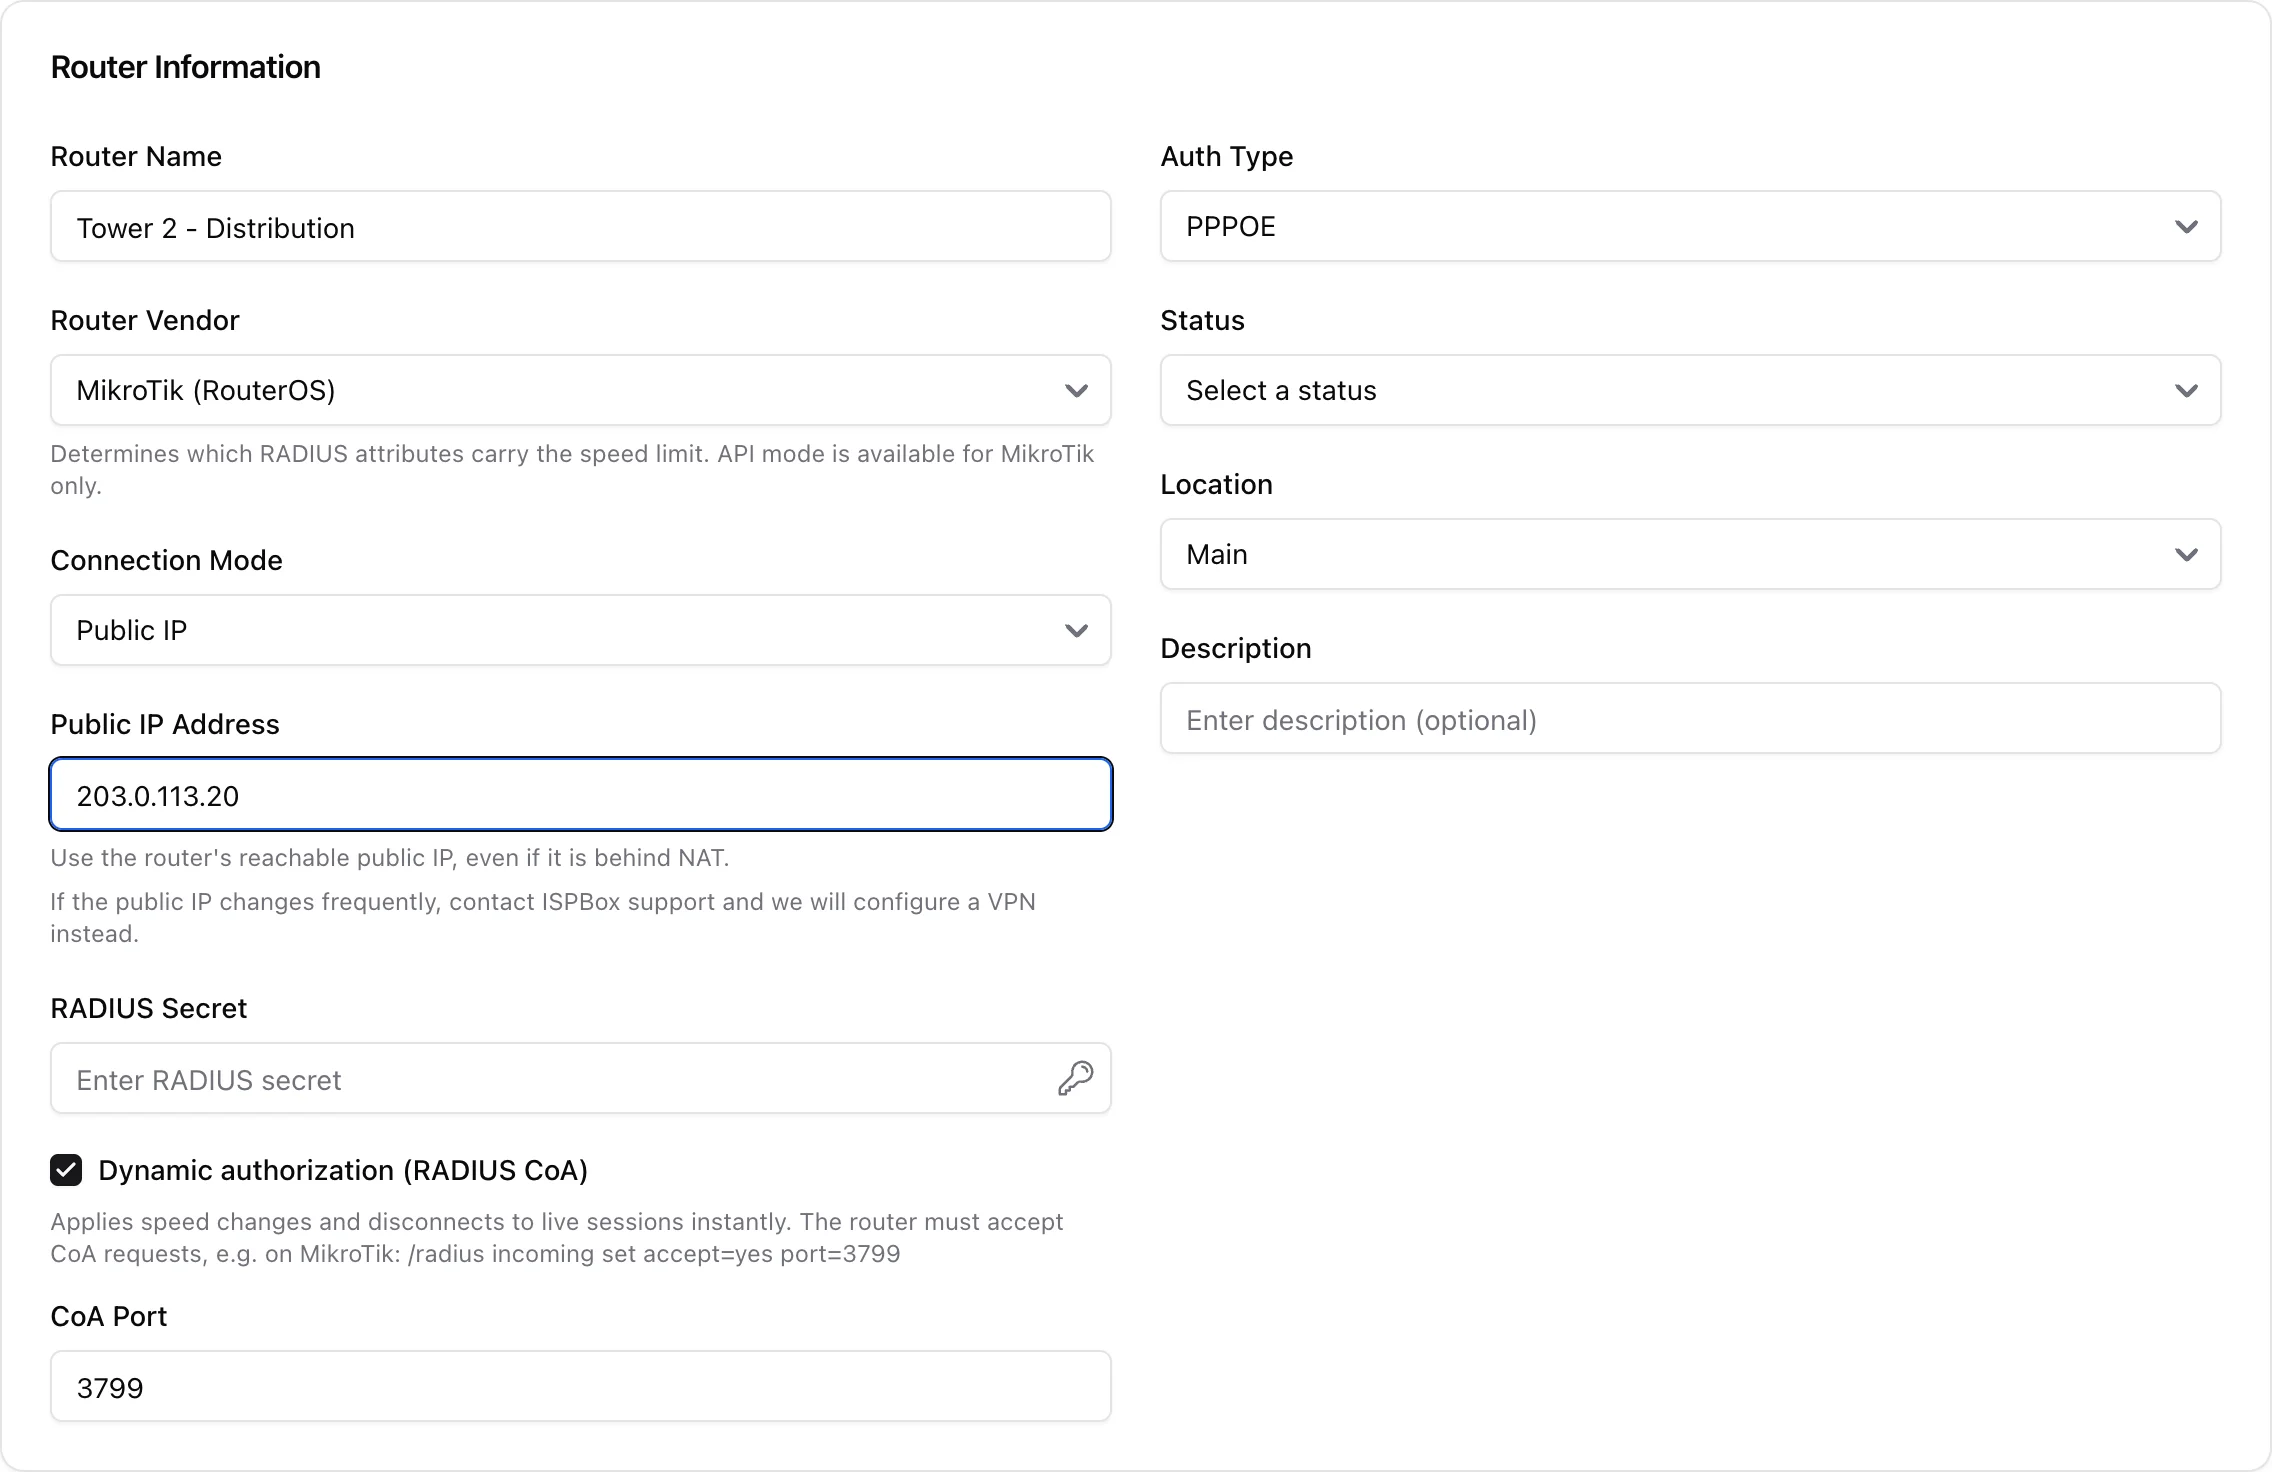
After saving, define the router's IP pools (a PPPoE pool for PPPoE access, a Clients pool for DHCP) so services can hand out addresses, then point the router's RADIUS client at the ISPBox RADIUS server with the same secret. The MikroTik-specific device steps are in How to add a router with RADIUS authentication; on other platforms the ISPBox side is identical - only the on-router RADIUS configuration differs.
6. Policy vendors: Cisco and Juniper
Cisco and Juniper do not take a raw speed number over RADIUS - they reference a QoS policy by name. Selecting one of these vendors adds two fields, Upload QoS Policy Name and Download QoS Policy Name:
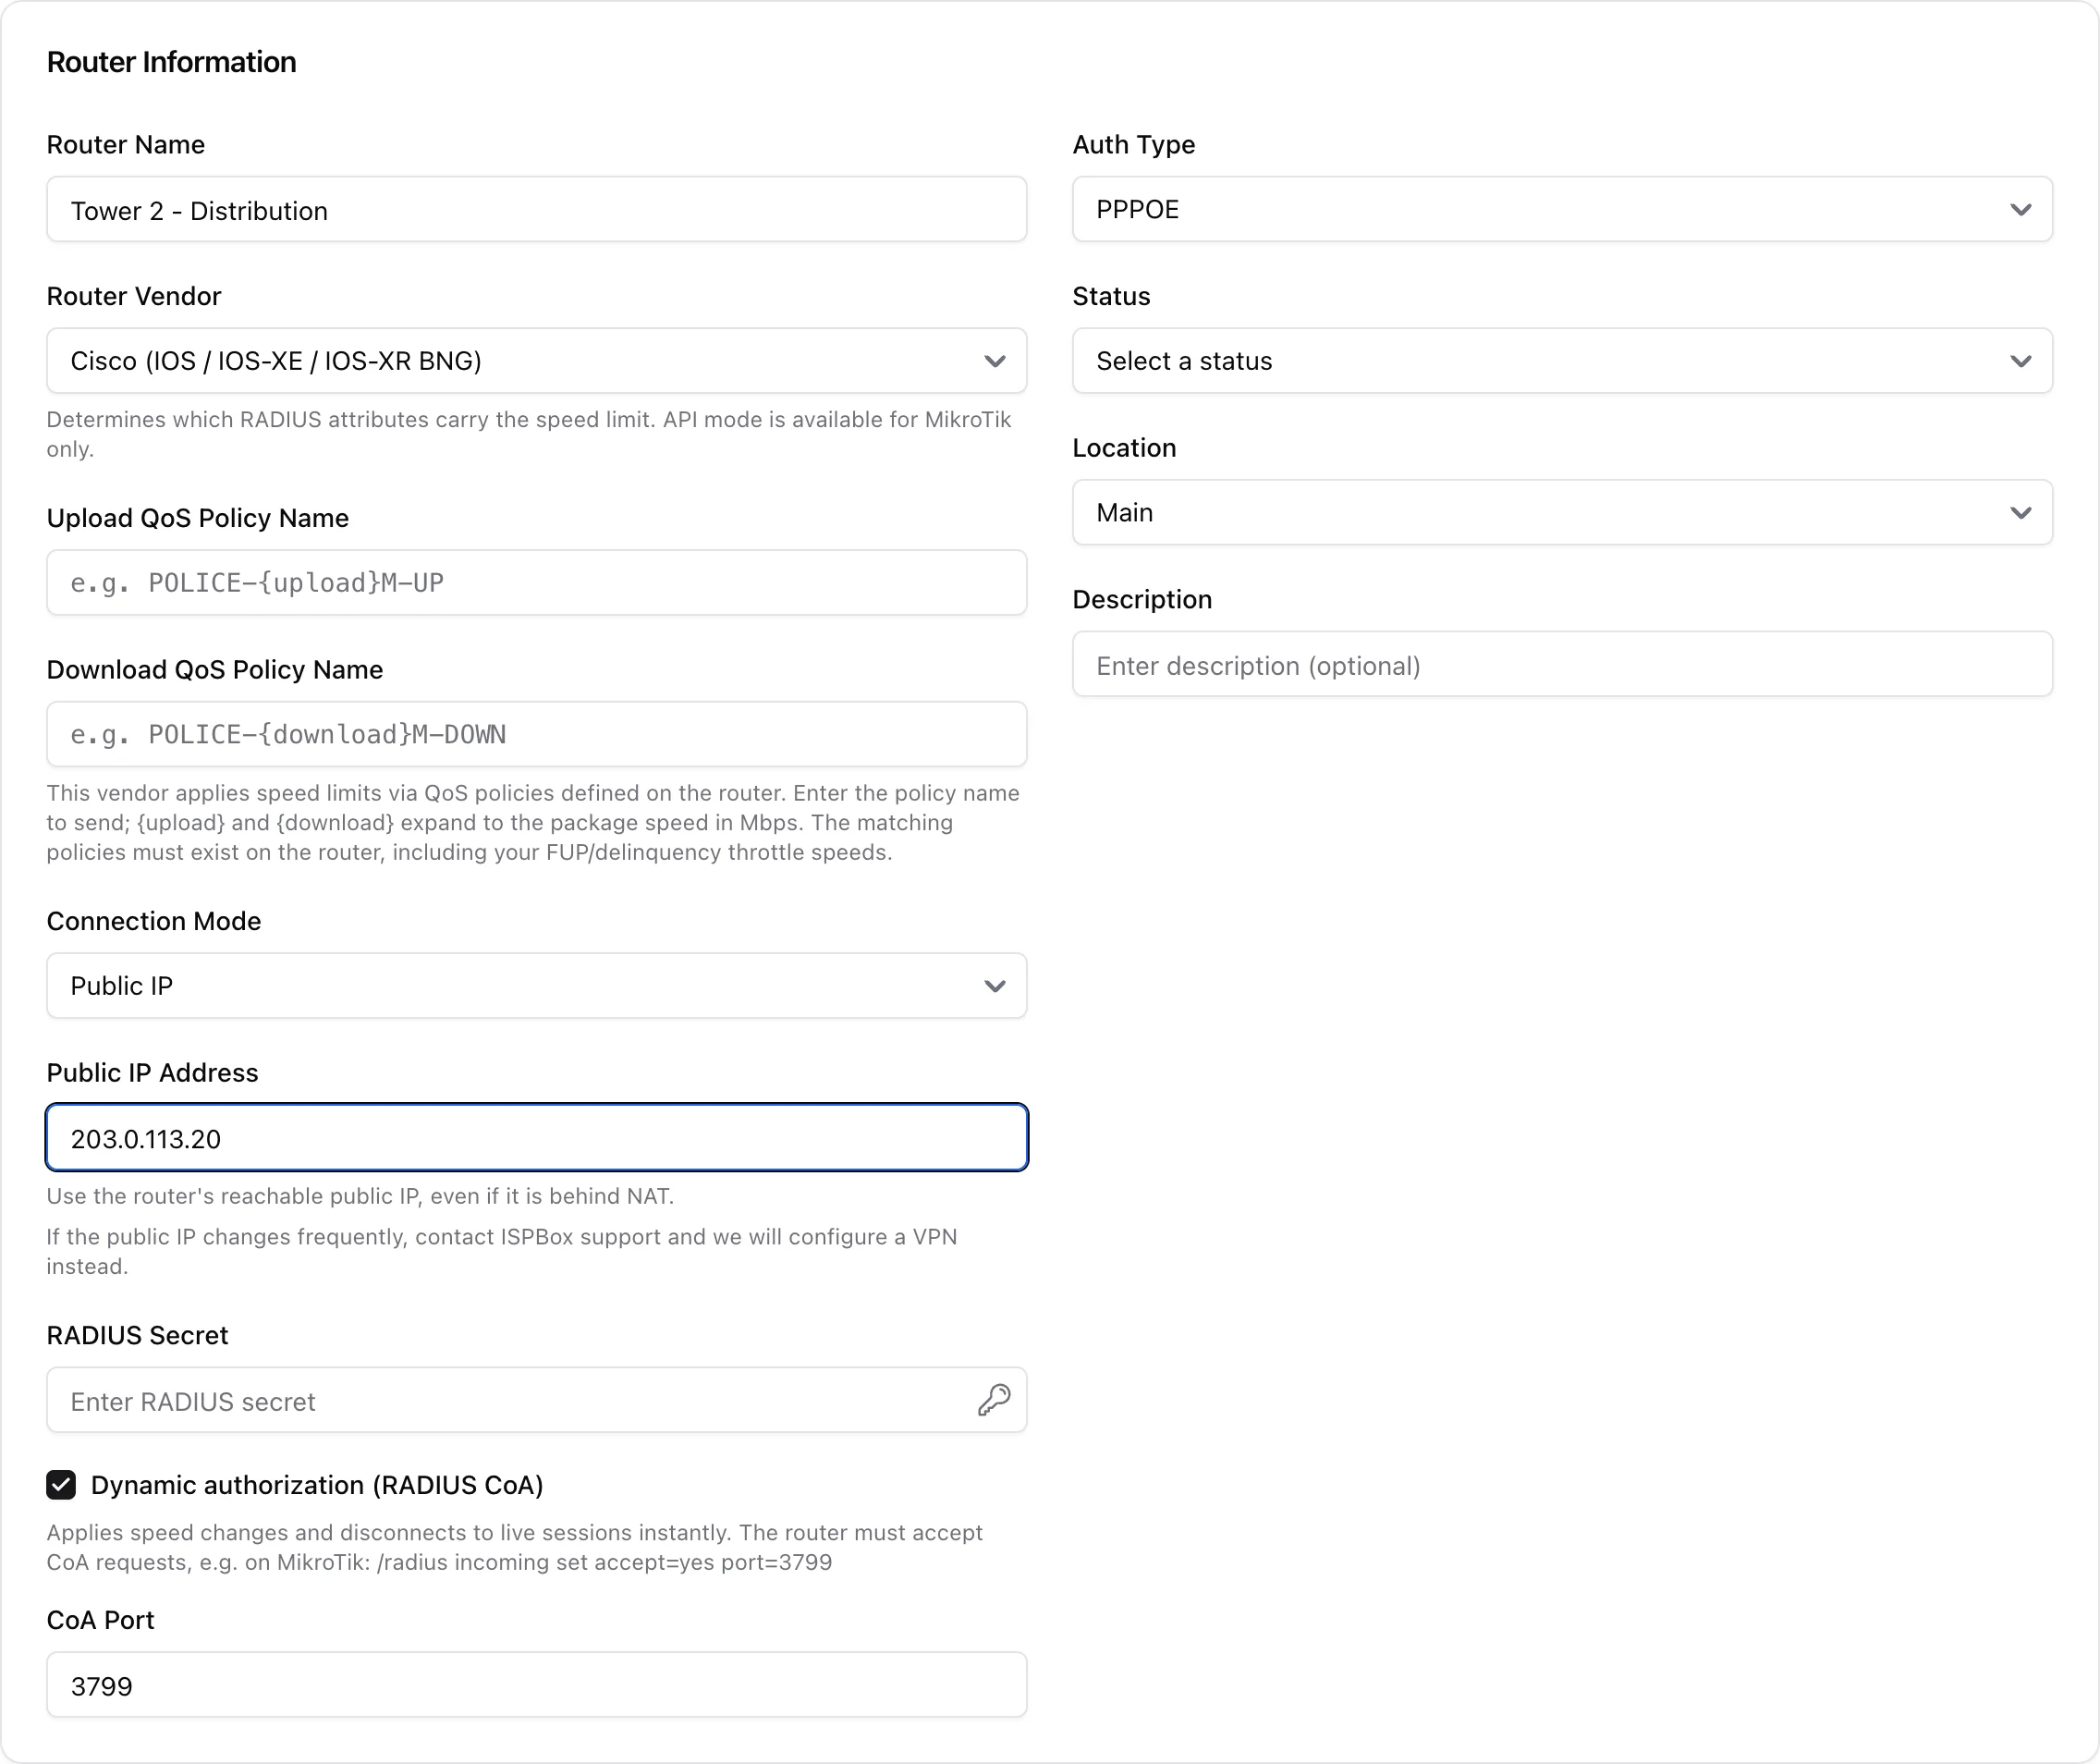
Enter a template such as POLICE-{download}M-DOWN. The {upload} and {download} placeholders expand to the package speed in Mbps, so ISPBox sends the right policy name per service. The matching policies must already exist on the router - including the throttle speeds you use for FUP data caps and delinquency limiting, otherwise those actions have no policy to reference.
7. WireGuard mode
Switch Connection Mode to WireGuard Tunnel and the public-IP field is replaced by tunnel options: a provisioning mode (generate a config for you, or use your router's existing keys), an optional external IP for identifying NAT'd routers, and the persistent keepalive (default 25 seconds):
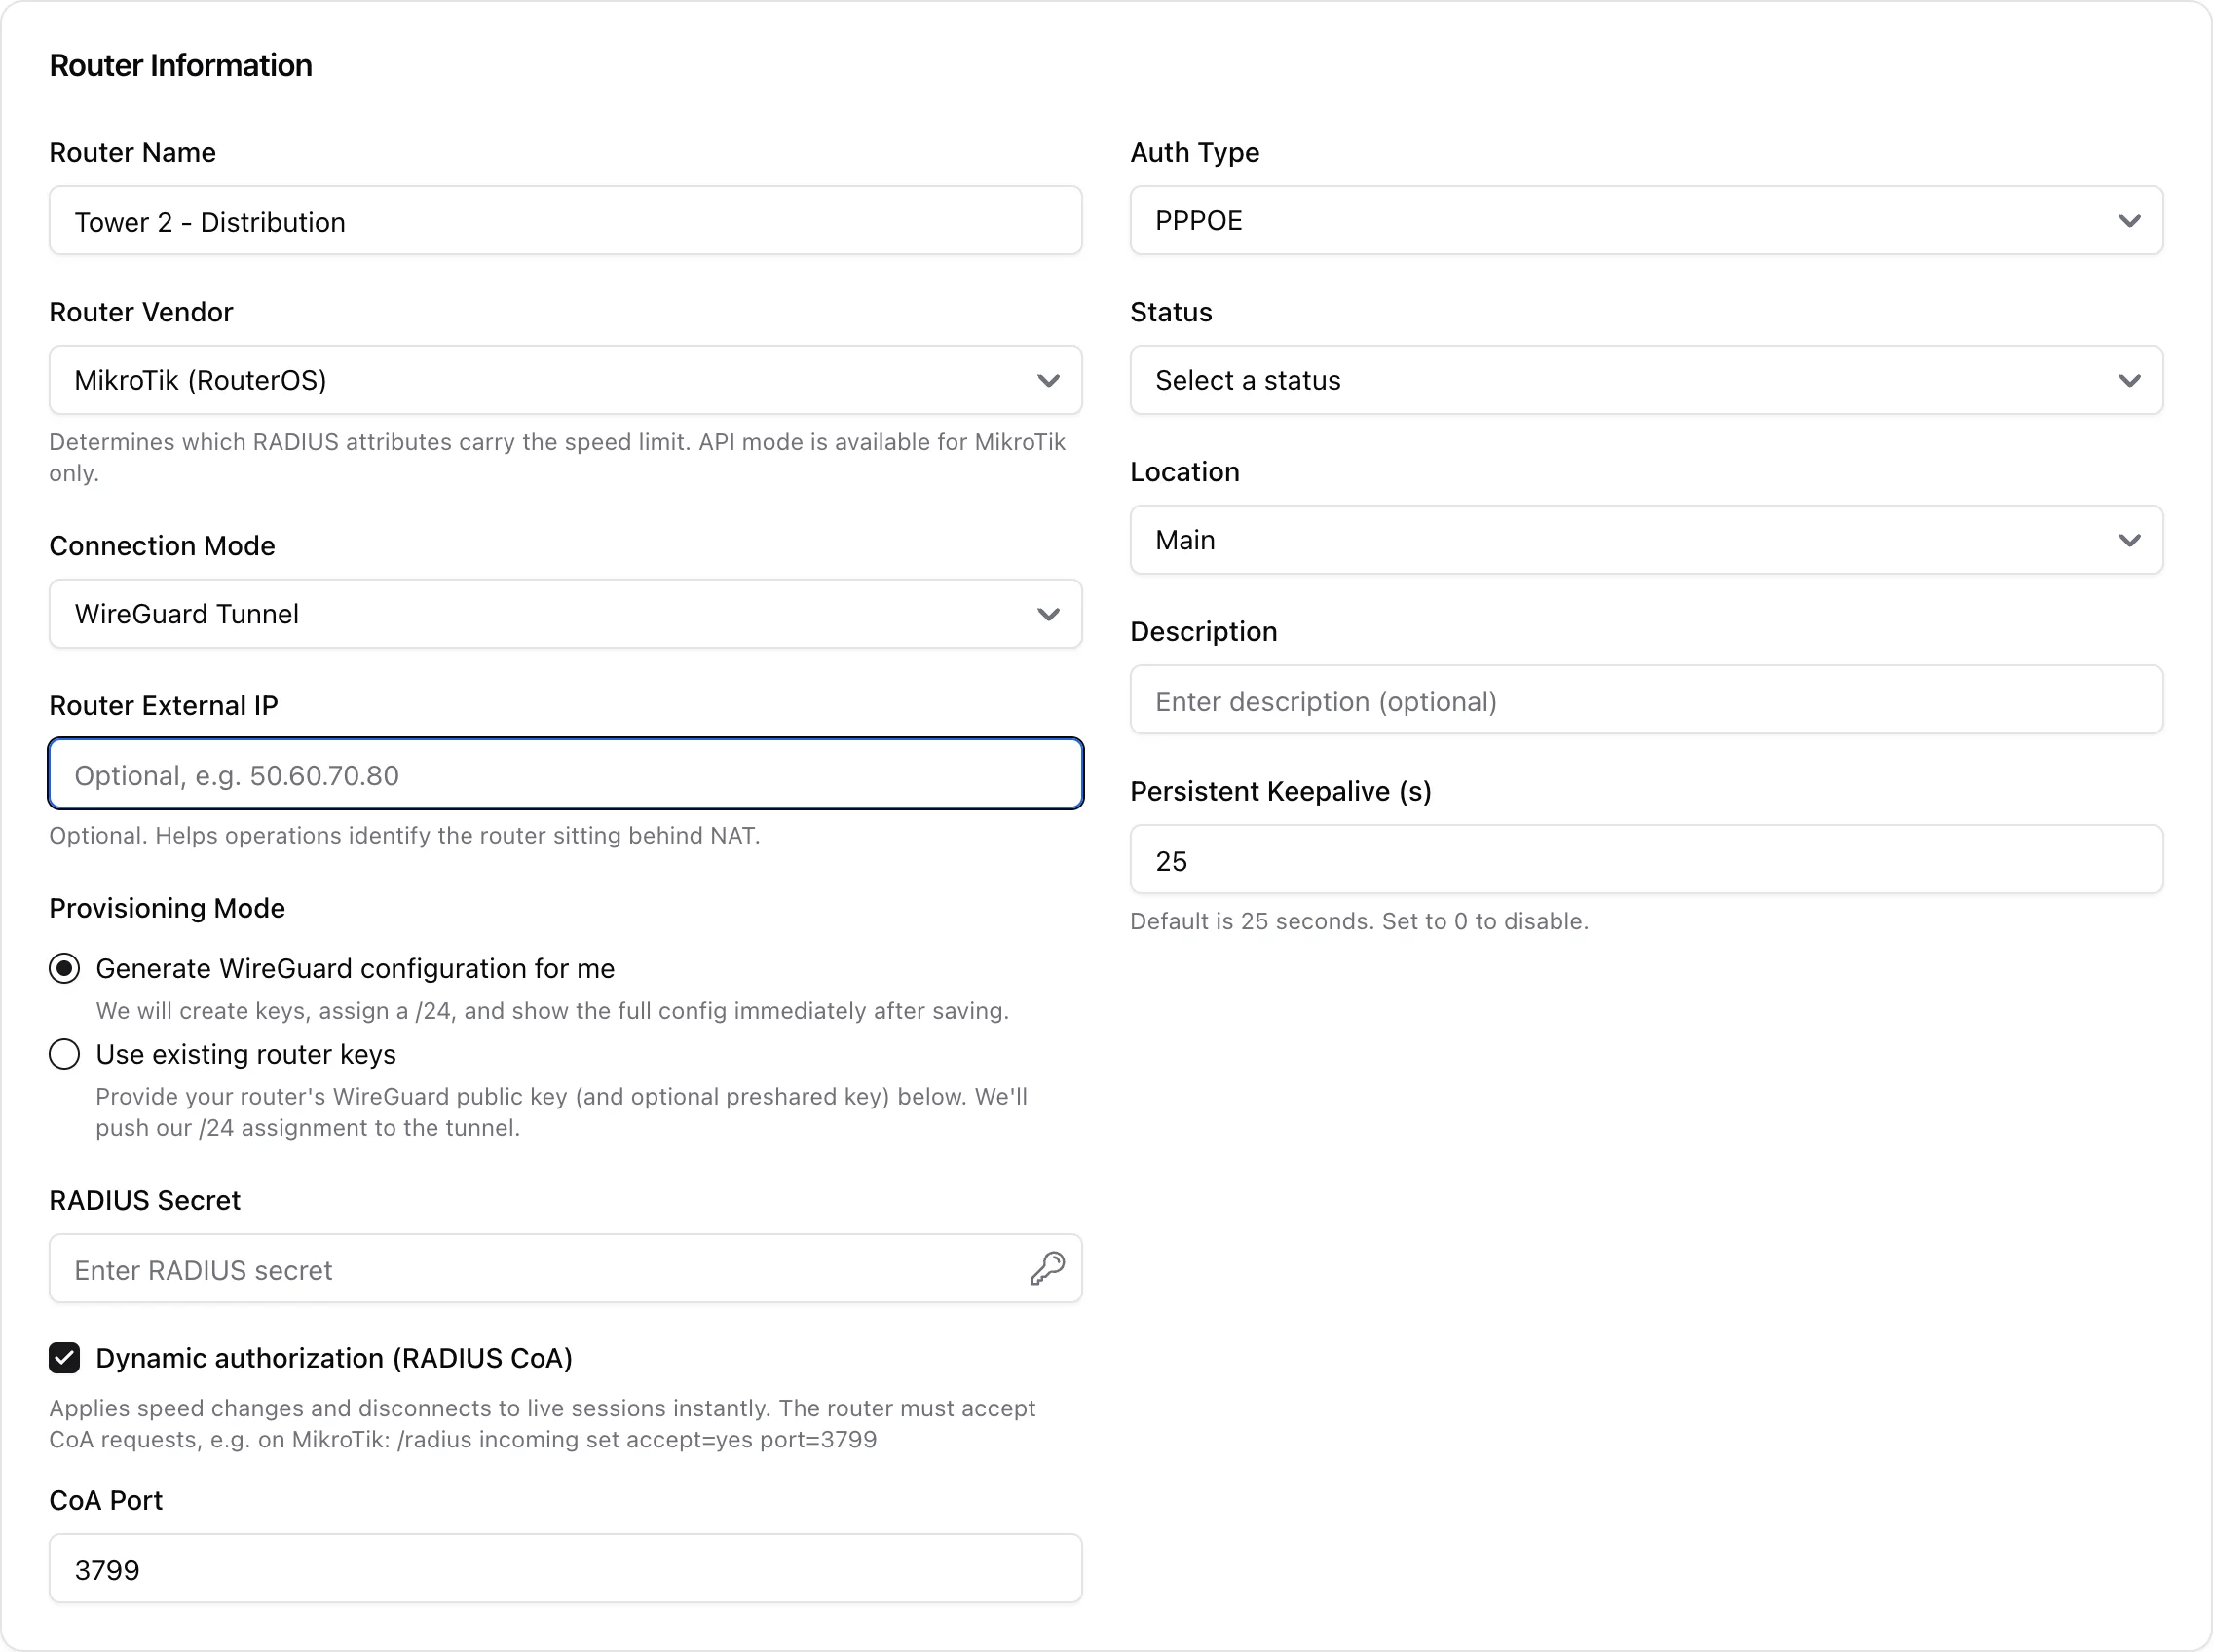
If you choose "Generate for me", ISPBox creates the keys, assigns a /24, and shows the full client configuration immediately after saving - copy it before leaving the page, it is only shown once.
8. Live speed changes with RADIUS CoA
The Dynamic authorization (RADIUS CoA) toggle lets ISPBox apply speed changes and disconnects to live sessions instantly, without waiting for the customer to reconnect - used by plan changes, FUP throttling and delinquency limiting. The router must accept CoA on the configured port (default 3799). On MikroTik that is /radius incoming set accept=yes port=3799; other vendors have their own CoA/dynamic-authorization setting.
Next steps
- How to add a router with RADIUS authentication (MikroTik device steps)
- How to add a router with WireGuard + API (MikroTik)
- Quick Start: router, package, client and service
Running a vendor we do not list yet, or need CoA help on a non-MikroTik platform? Write to [email protected].