Client Messaging
Send one personalised message to many customers by email or SMS. Target by location, status, router, device or incident, pick clients or use a segment, add per-language versions, schedule for later, and track opens and clicks.
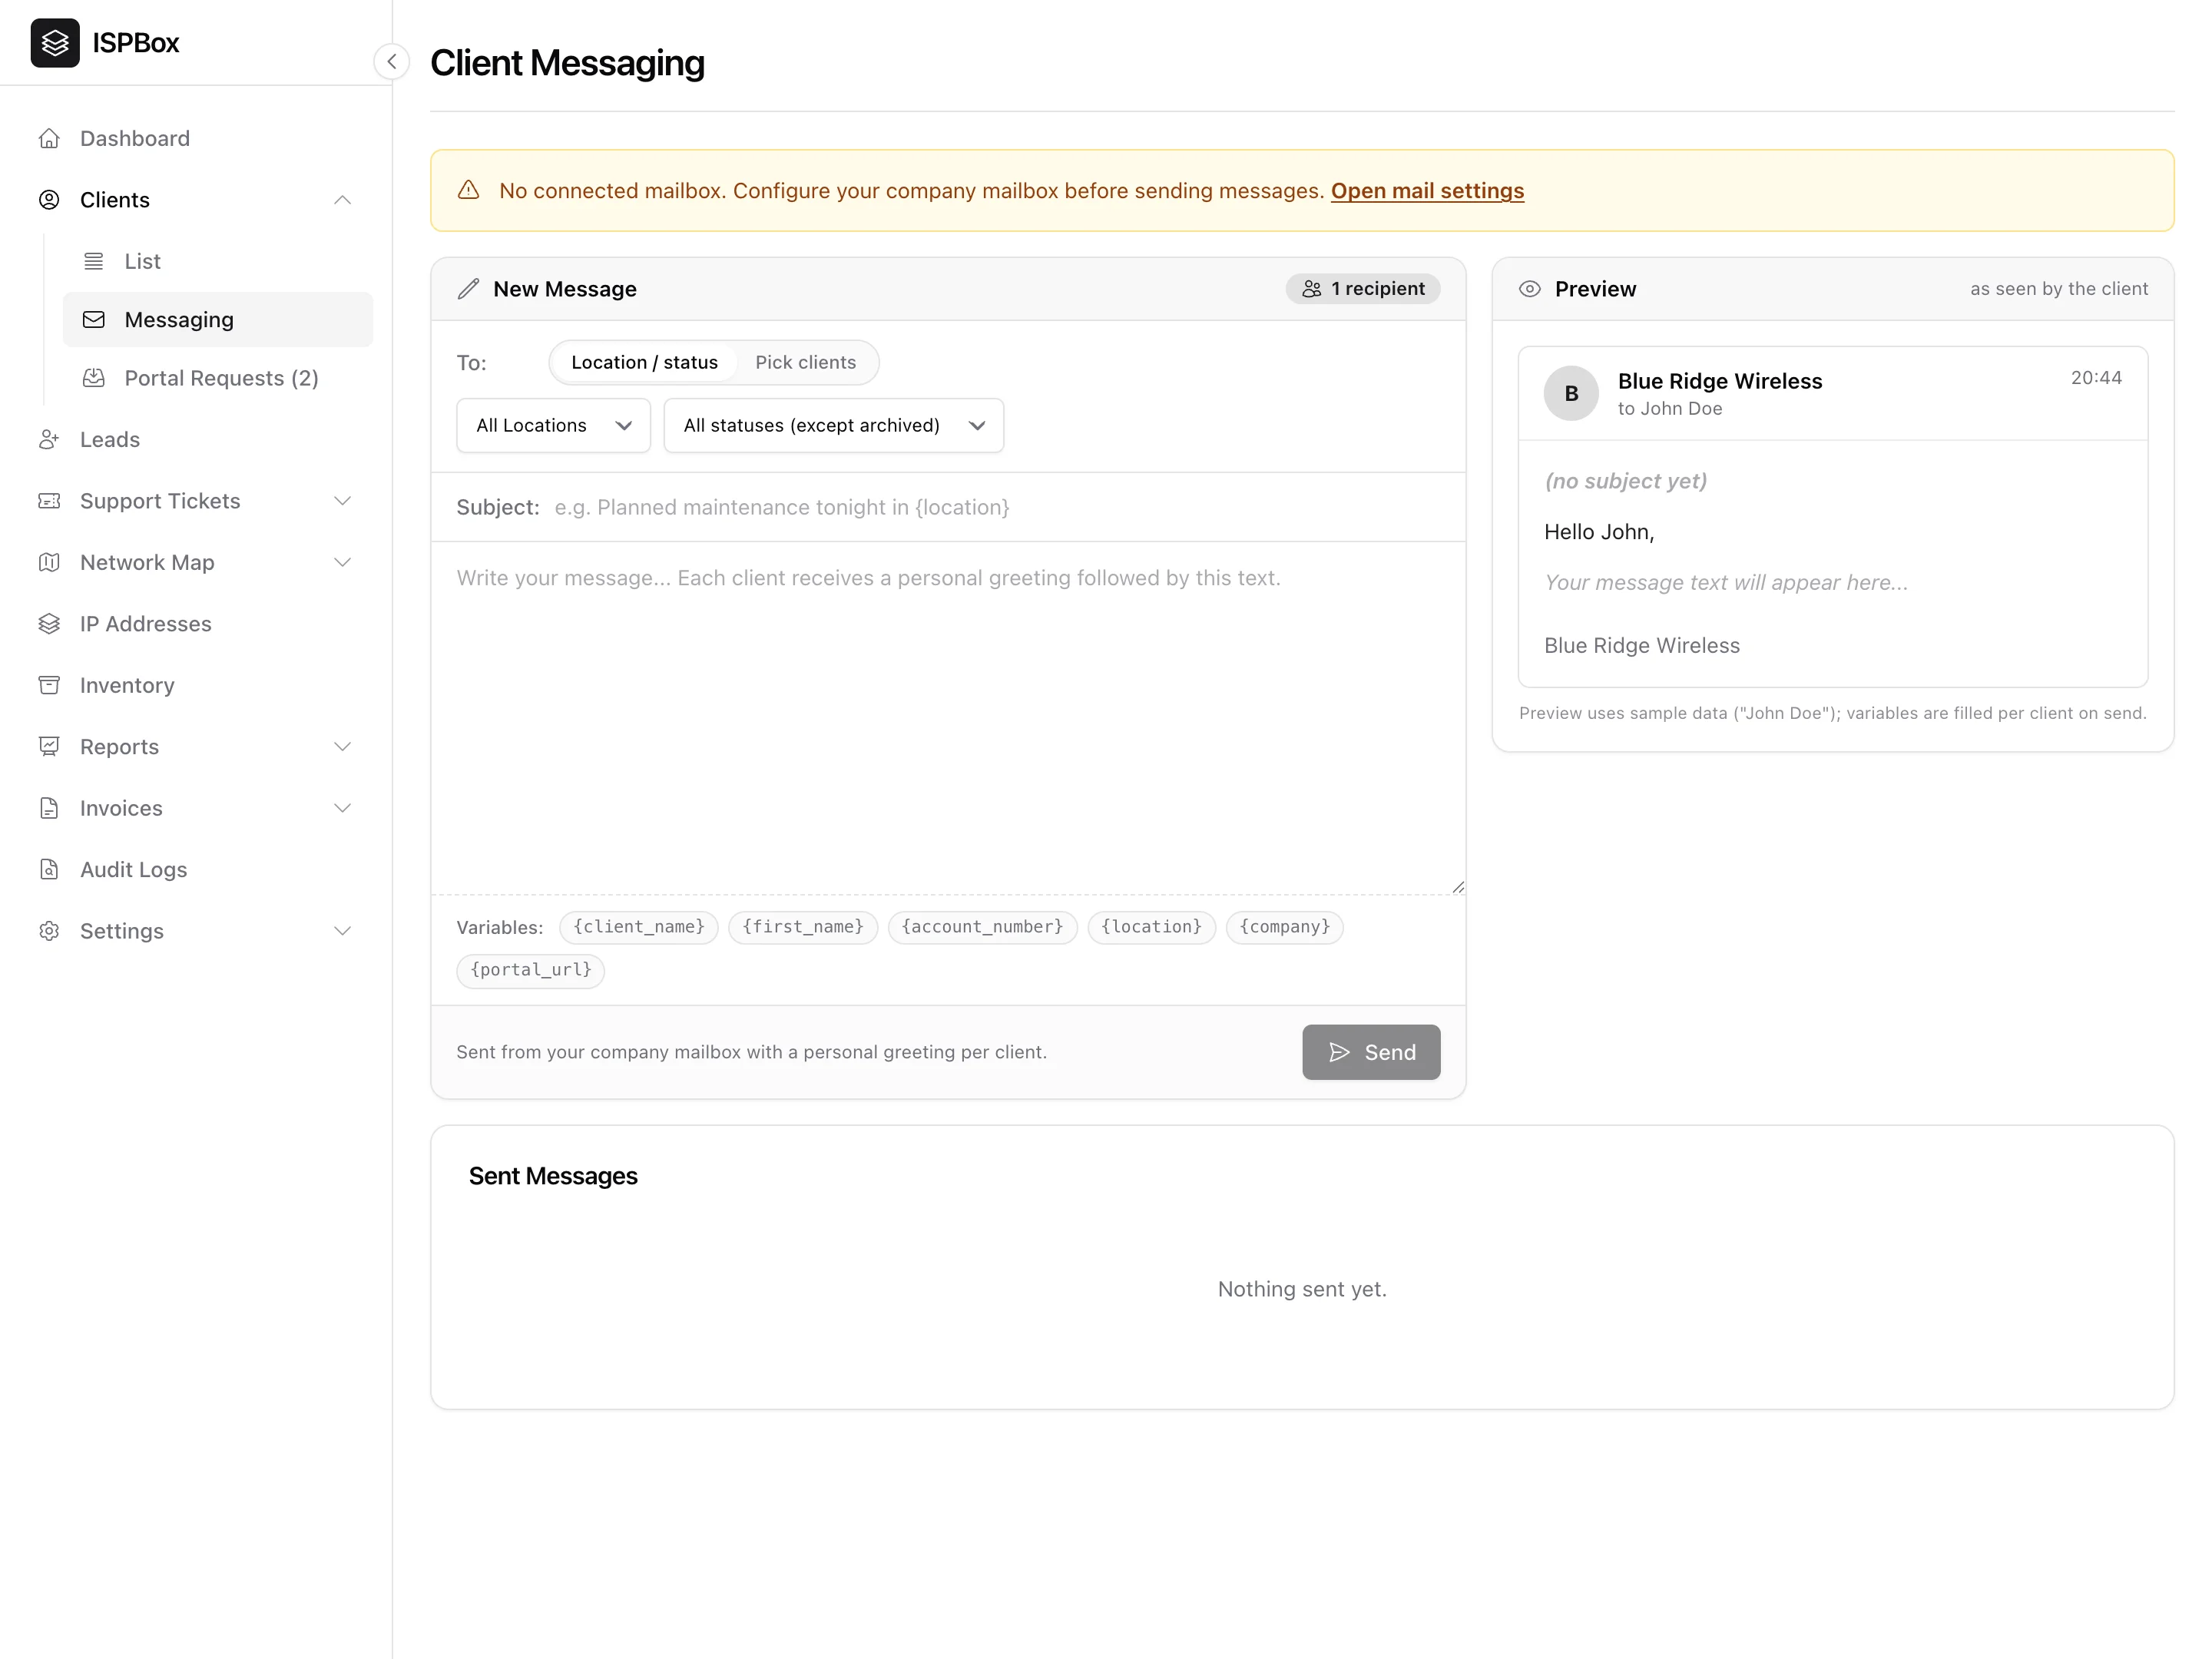
Client messaging sends one message to many customers at once - a maintenance notice, a price-change announcement, or an outage update - by email and, if configured, SMS. Each recipient gets a personalised copy, not an obvious bulk blast. Open it from Clients > Messaging. It is part of the Messaging feature (Growth and Scale plans) and needs the clients manage permission; sending requires a connected mailbox (and Twilio for SMS).
1. Choosing who to message
The To: row offers three ways to build an audience:
- Location / status - everyone matching a location and/or account status (active, pending, inactive, overdue; archived clients are always excluded). The same row also targets by network: router (clients provisioned on it), network device (everything downstream of a tower, AP or sector on the network map) and incident (the clients an outage is recorded against). Combine several and they narrow each other down.
- Pick clients - hand-select individual customers by name, email, account number, address or phone.
- Segment - a saved marketing segment. This option only appears once you have at least one client segment saved under Marketing > Segments.
ISPBox shows a live recipient count next to the compose card, and it only ever counts clients who are actually reachable on the chosen channel, so you never see "sent to 300" when half have no email.
One rule to know: the marketing opt-out flag on a client is only applied to segment audiences. Filter-based and hand-picked sends still reach opted-out customers, which is what you want for genuine service notices (outages, maintenance, billing) and what you must be careful about for anything promotional - build promos as a segment.
2. Writing the message
Add a subject (email only) and your message body. Personalise it with variables that are filled in per customer on send:
{client_name},{first_name},{account_number},{location},{company},{portal_url}
Emails are wrapped in your normal ISPBox mail layout: each one opens with an automatic greeting ("Hello Sarah,") and is signed off with your company name, so start your text at the first real sentence instead of writing your own "Hi ...," line. The Preview pane on the right shows the message exactly as a client would see it, using sample data.
3. Language versions
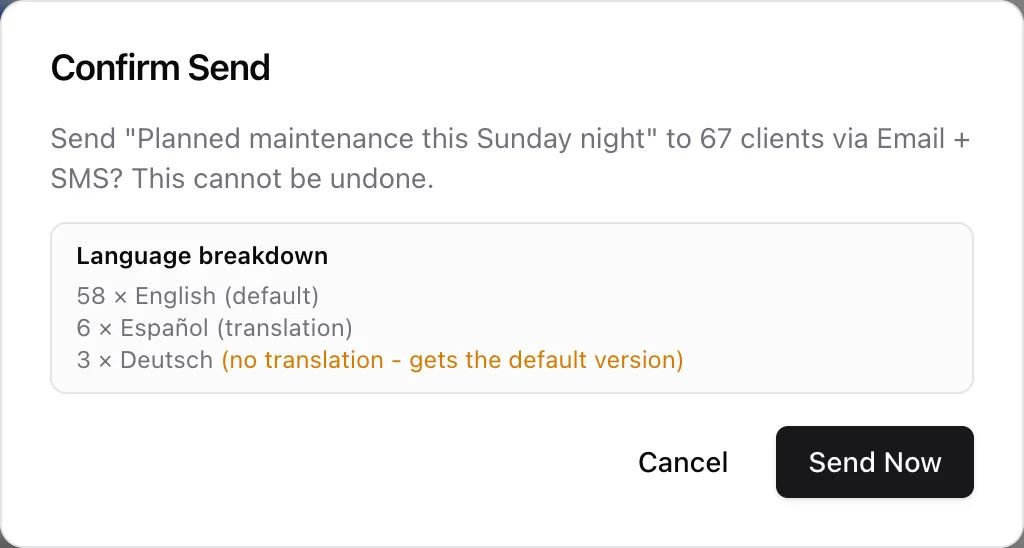
If your customers do not all read the same language, click Add translation and pick one. You get a tab per language next to Default, each with its own subject and body, and an empty translation blocks the send rather than quietly falling back. On send, every customer receives the version matching their client language; anyone whose language has no translation gets the default text.
The confirm dialog shows the language breakdown of the audience before anything goes out, and flags the languages that will fall back to the default version - a quick way to spot that you have, say, six Spanish-speaking customers worth a translation. Language versions apply to SMS too.
4. Channels
Send by email, SMS, or both. The Via: row only appears once Twilio is configured; without it every send is email. What differs between the two:
- Email goes out from your own company mailbox (so replies come back to you), with the automatic greeting and your subject line.
- SMS is your message body as plain text - no subject line and no greeting. Write a body that stands on its own and keep it short, and remember that clients without a phone number on file simply get the email instead.
5. Campaign and scheduling
Two optional controls sit under the message body:
- Campaign - attribute the send to a marketing campaign (shown when you have campaigns).
- Send later - pick a date and time in your own timezone and the button changes from Send to Schedule. Scheduled messages sit in the history with a Cancel button until they fire; a schedule in the past is treated as "send now".
6. Sending and history
Click Send, check the confirmation dialog, then Send Now. ISPBox re-checks the reachable recipients at send time and delivers a personalised copy to each. The Sent Messages list below keeps the history: who sent it, the channels used, the sent/failed counts, and how many recipients opened and clicked the email (tracked per recipient through an open pixel and rewritten links).
Handy shortcut: from an outage incident, Message clients opens this page with the affected customers pre-selected and an outage draft ready to edit.