Custom Domain
Serve the customer portal, status page, coverage checker and staff panel from portal.yourisp.com next to your {subdomain}.ispbox.net address: one CNAME record, an automatic certificate, and what changes for client links and emails.
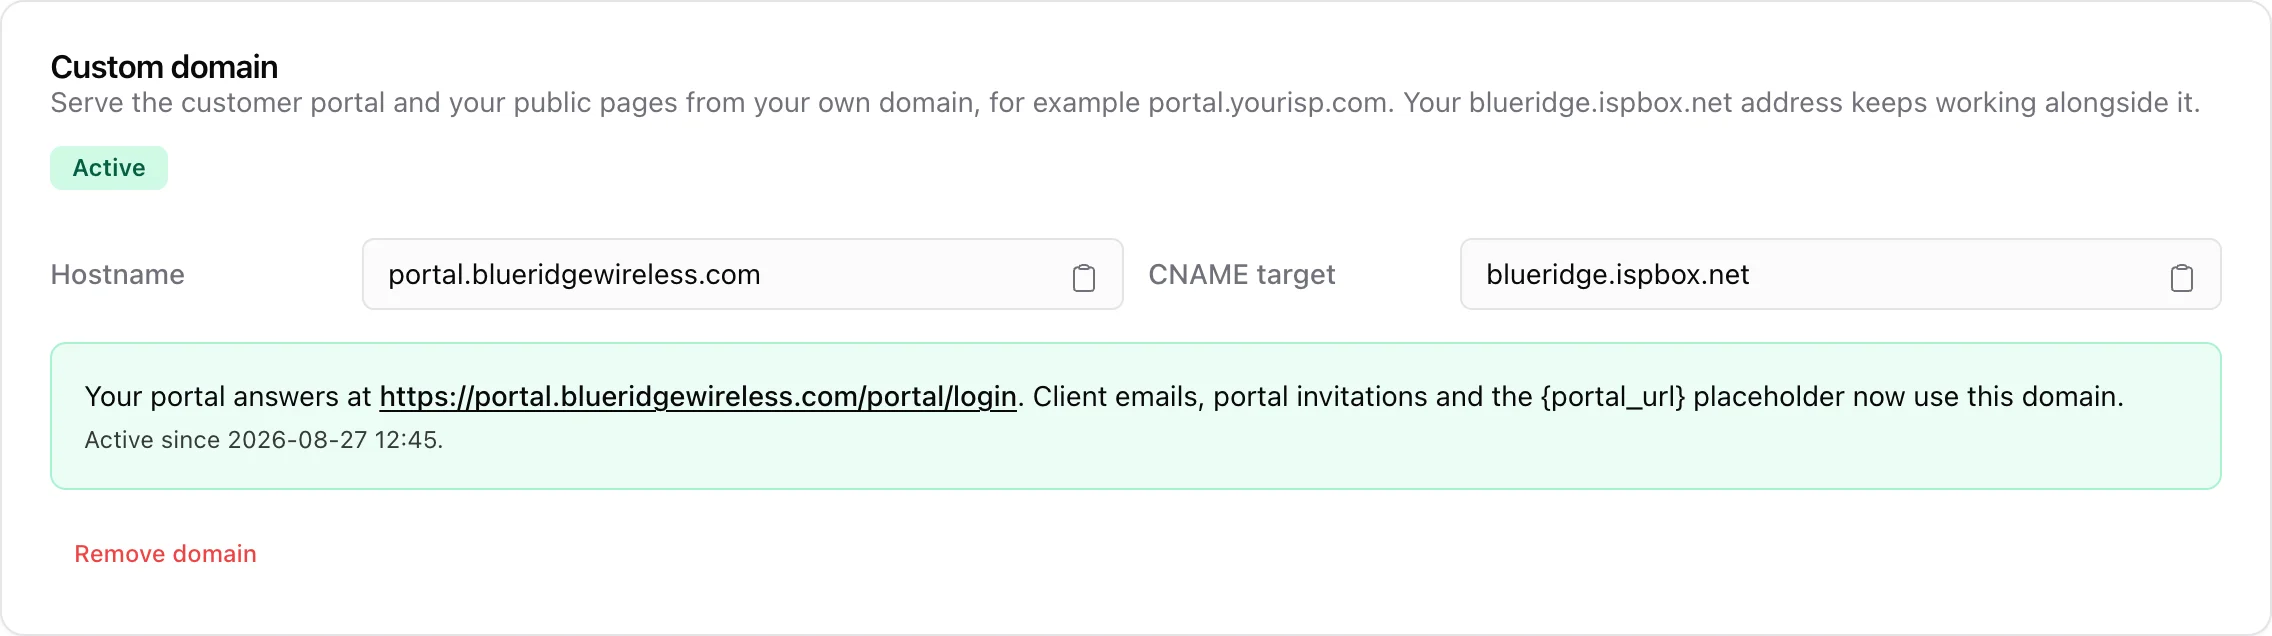
Your workspace always answers at {subdomain}.ispbox.net. A custom domain lets you serve the same thing from a hostname of your own - for example portal.yourisp.com - so the customer portal, your public status page and coverage checker, and the staff panel all live on your brand. Both addresses work at the same time, and you only have to add one DNS record. Once the domain is live you can also make it the primary address, so the {subdomain}.ispbox.net address redirects there and nobody ends up on it by accident.
Before you start
- A subdomain of a domain you own, such as
portal.yourisp.com,my.yourisp.comoraccount.yourisp.com. A bare domain (yourisp.com) is not accepted, and neither is anything underispbox.net. - Access to the DNS zone for that domain, so you can add one CNAME record.
- The
settings.managepermission. The card lives at the bottom of Settings > Company. There is no plan gating: every workspace can connect a domain.
Step 1 - add the CNAME record
At your DNS provider, create one record:
| Type | Name | Target |
|---|---|---|
CNAME | portal | blueridge.ispbox.net |
Name is the label you want in front of your domain: portal gives you portal.yourisp.com. Target is your own workspace address, {subdomain}.ispbox.net - the card shows it with a copy button, so you do not have to type it. In the example above the workspace is blueridge, so the target is blueridge.ispbox.net.
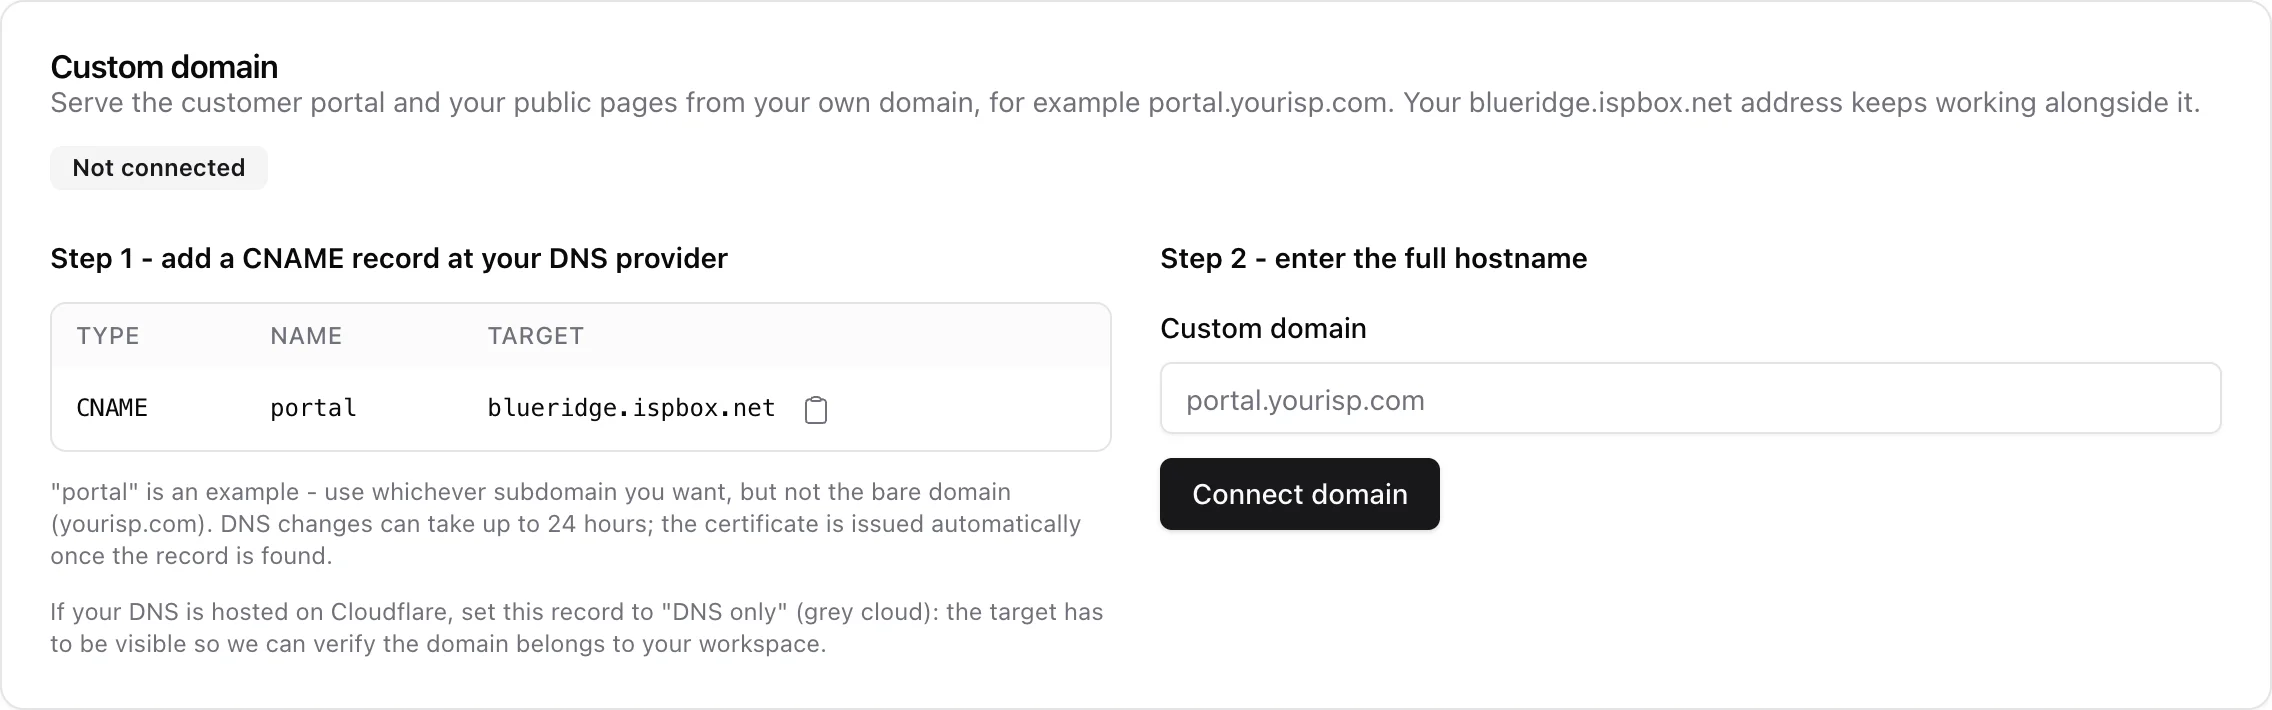
If your DNS is hosted on Cloudflare, set the record to "DNS only" (the grey cloud), not "Proxied" (orange). A proxied record hides the target, and the target is what proves the hostname belongs to your workspace. A proxied record is rejected with a message telling you to switch it to DNS only.
DNS changes can take up to 24 hours to propagate, although most providers publish them in a few minutes.
Step 2 - connect it in ISPBox
Open Settings > Company, scroll to the Custom domain card, type the full hostname (portal.yourisp.com) and press Connect domain. You can paste a full URL such as https://Portal.YourISP.com/login; it is reduced to the bare hostname for you.
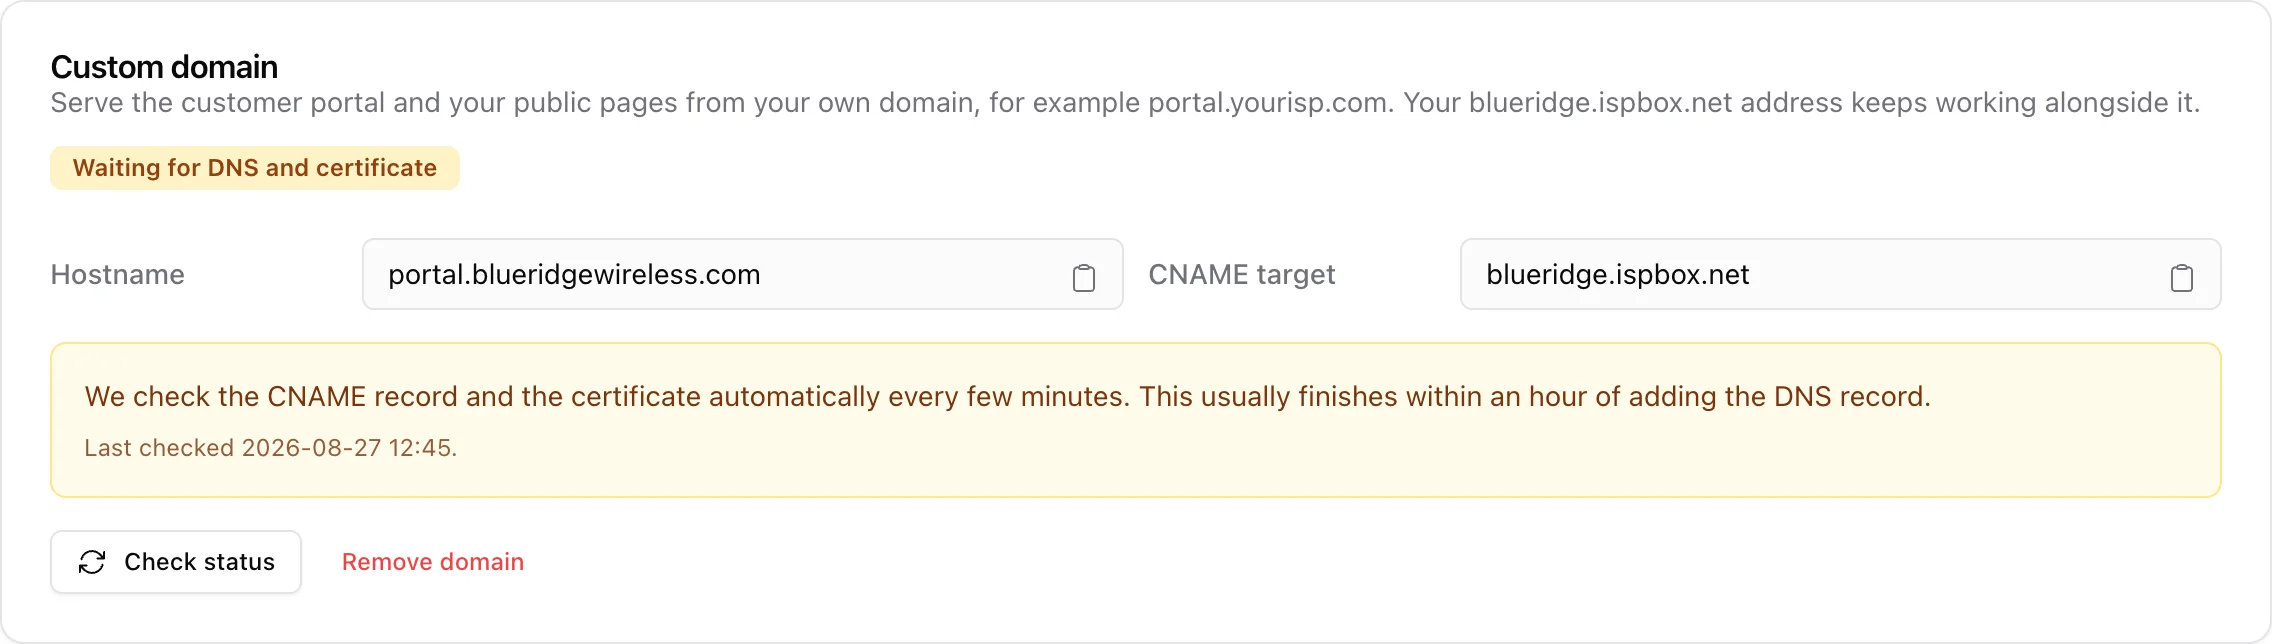
The card switches to Waiting for DNS and certificate and starts checking on its own.
What happens next
The card has three states:
- Waiting for DNS and certificate - the hostname is registered, but it is not being served yet. Two things have to line up: the TLS certificate has to be issued, and your CNAME record has to be visibly pointing at your own
{subdomain}.ispbox.net. That second check is the ownership proof, which is why the record has to stay DNS only. - Active - the hostname is served and the certificate is live.
- Failed - the certificate could not be issued. The card shows what the provider said and offers Retry, which registers the hostname again from scratch.
Checks run automatically. Right after you connect, a background job polls for you, backing off from one minute to fifteen as it goes, and a scheduled task re-checks every pending domain every fifteen minutes as a safety net. Check status on the card runs a check immediately if you do not want to wait. The certificate itself is issued for you (through Cloudflare) and is usually ready within minutes of the DNS record becoming visible.
Once a domain is active it stays active: it is re-checked once a day so an expired or revoked certificate gets noticed, but a temporary hiccup at the certificate provider will not take a live domain down - only a real failure moves it to Failed.
What changes once it is active
- The customer portal answers at
https://portal.yourisp.com/portal/login. The active card links straight to it. - Your public pages - the status page and the coverage checker - are served on the same hostname.
- The staff panel works there too. Sessions are per hostname, so signing in on the custom domain does not sign you in on
{subdomain}.ispbox.net, and the other way round. - Client emails switch over: portal invitations, portal password resets, invoice and billing emails, the
{portal_url}placeholder in mass messages and message templates, and the link in the email footer all use the custom domain from then on. - Staff emails move too: invitations, password resets and email verification for your own users land on the custom domain, as do ticket replies, shared receipts, agent notifications and the return pages of card payments. Signing in on the central
ispbox.netlogin page also hands you over to the custom domain. - Your
{subdomain}.ispbox.netaddress keeps working exactly as before, so bookmarks and links in older emails never break - until you switch on Use as primary address (next section), which sends those visitors to the custom domain instead. - Mobile app sign-in QR codes keep using
{subdomain}.ispbox.net, by design, even when you generate them on the custom domain.
Make it the primary address

With the domain active, the card shows a switch called Use as primary address. Turn it on when you want your domain to be the only address your staff, agents and customers ever see:
- Anyone who opens a page on
{subdomain}.ispbox.netin a browser is redirected to the same page on your domain, query string included. Bookmarks, old emails and typed addresses all end up on the custom domain. - The central
ispbox.netlogin page hands you over to the custom domain, and/adminon your domain opens the staff dashboard, soportal.yourisp.com/admin,portal.yourisp.com/portalandportal.yourisp.com/agentare the three entry points for staff, customers and agents. - Machines are not redirected: the REST API, webhooks from payment providers, the AI assistant (MCP) endpoints, the mobile apps and the login page your routers fetch for guest wifi keep using
{subdomain}.ispbox.net, so nothing you have configured elsewhere has to change. - Only a domain that is currently Active can be primary. If the certificate ever fails or you remove the domain, the redirect stops on its own and
{subdomain}.ispbox.netanswers again, so you can never lock yourself out.
Switch it off and both addresses answer again at once. The redirect is never cached by browsers, so switching it off takes effect for everyone at once.
To take ISPBox out of the picture completely, pair this with Hide ISPBox branding and your own favicon in the Branding card of Settings > Company.
Troubleshooting
- "No CNAME record found for ... yet." The record is not published yet. Check the spelling of the Name field at your DNS provider and give it time; propagation can take up to 24 hours.
- "CNAME for ... points at ..., but it must point at ..." The record exists but has the wrong target. It has to point at your own workspace address, not at
ispbox.netand not at another workspace's subdomain. - "... resolves to Cloudflare, but the CNAME is hidden behind a proxy." The record is proxied (orange cloud). Switch it to DNS only (grey cloud) in your Cloudflare DNS tab and check again.
- "Use a subdomain of your own domain (portal.yourisp.com), not the bare domain." You entered
yourisp.com. Add a label in front of it. - "This hostname belongs to ISPBox." You entered something under
ispbox.net. That address is already yours; a custom domain has to be a hostname of your own. - "This hostname is already connected to another workspace." Exactly one workspace can hold a given hostname. Remove it there first.
Removing or changing the domain
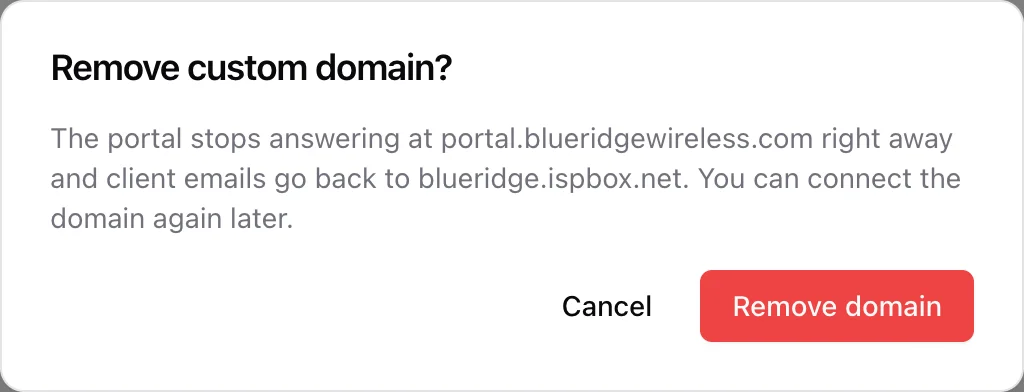
Remove domain asks for confirmation, then stops serving the hostname right away, drops it at the certificate provider, and puts client links back on {subdomain}.ispbox.net. Nothing else about your workspace changes, and you can connect the domain again later.
To move to a different hostname, remove the current one first - the hostname field comes back once no domain is connected - then connect the new one. Once you are done, delete the old CNAME record at your DNS provider so it does not point at an address you no longer use.