How to Add a New Client
Clients are your customers - the starting point for services, invoices, tickets and the portal. Add contact details, a service address with GPS, and optionally start a service right away.
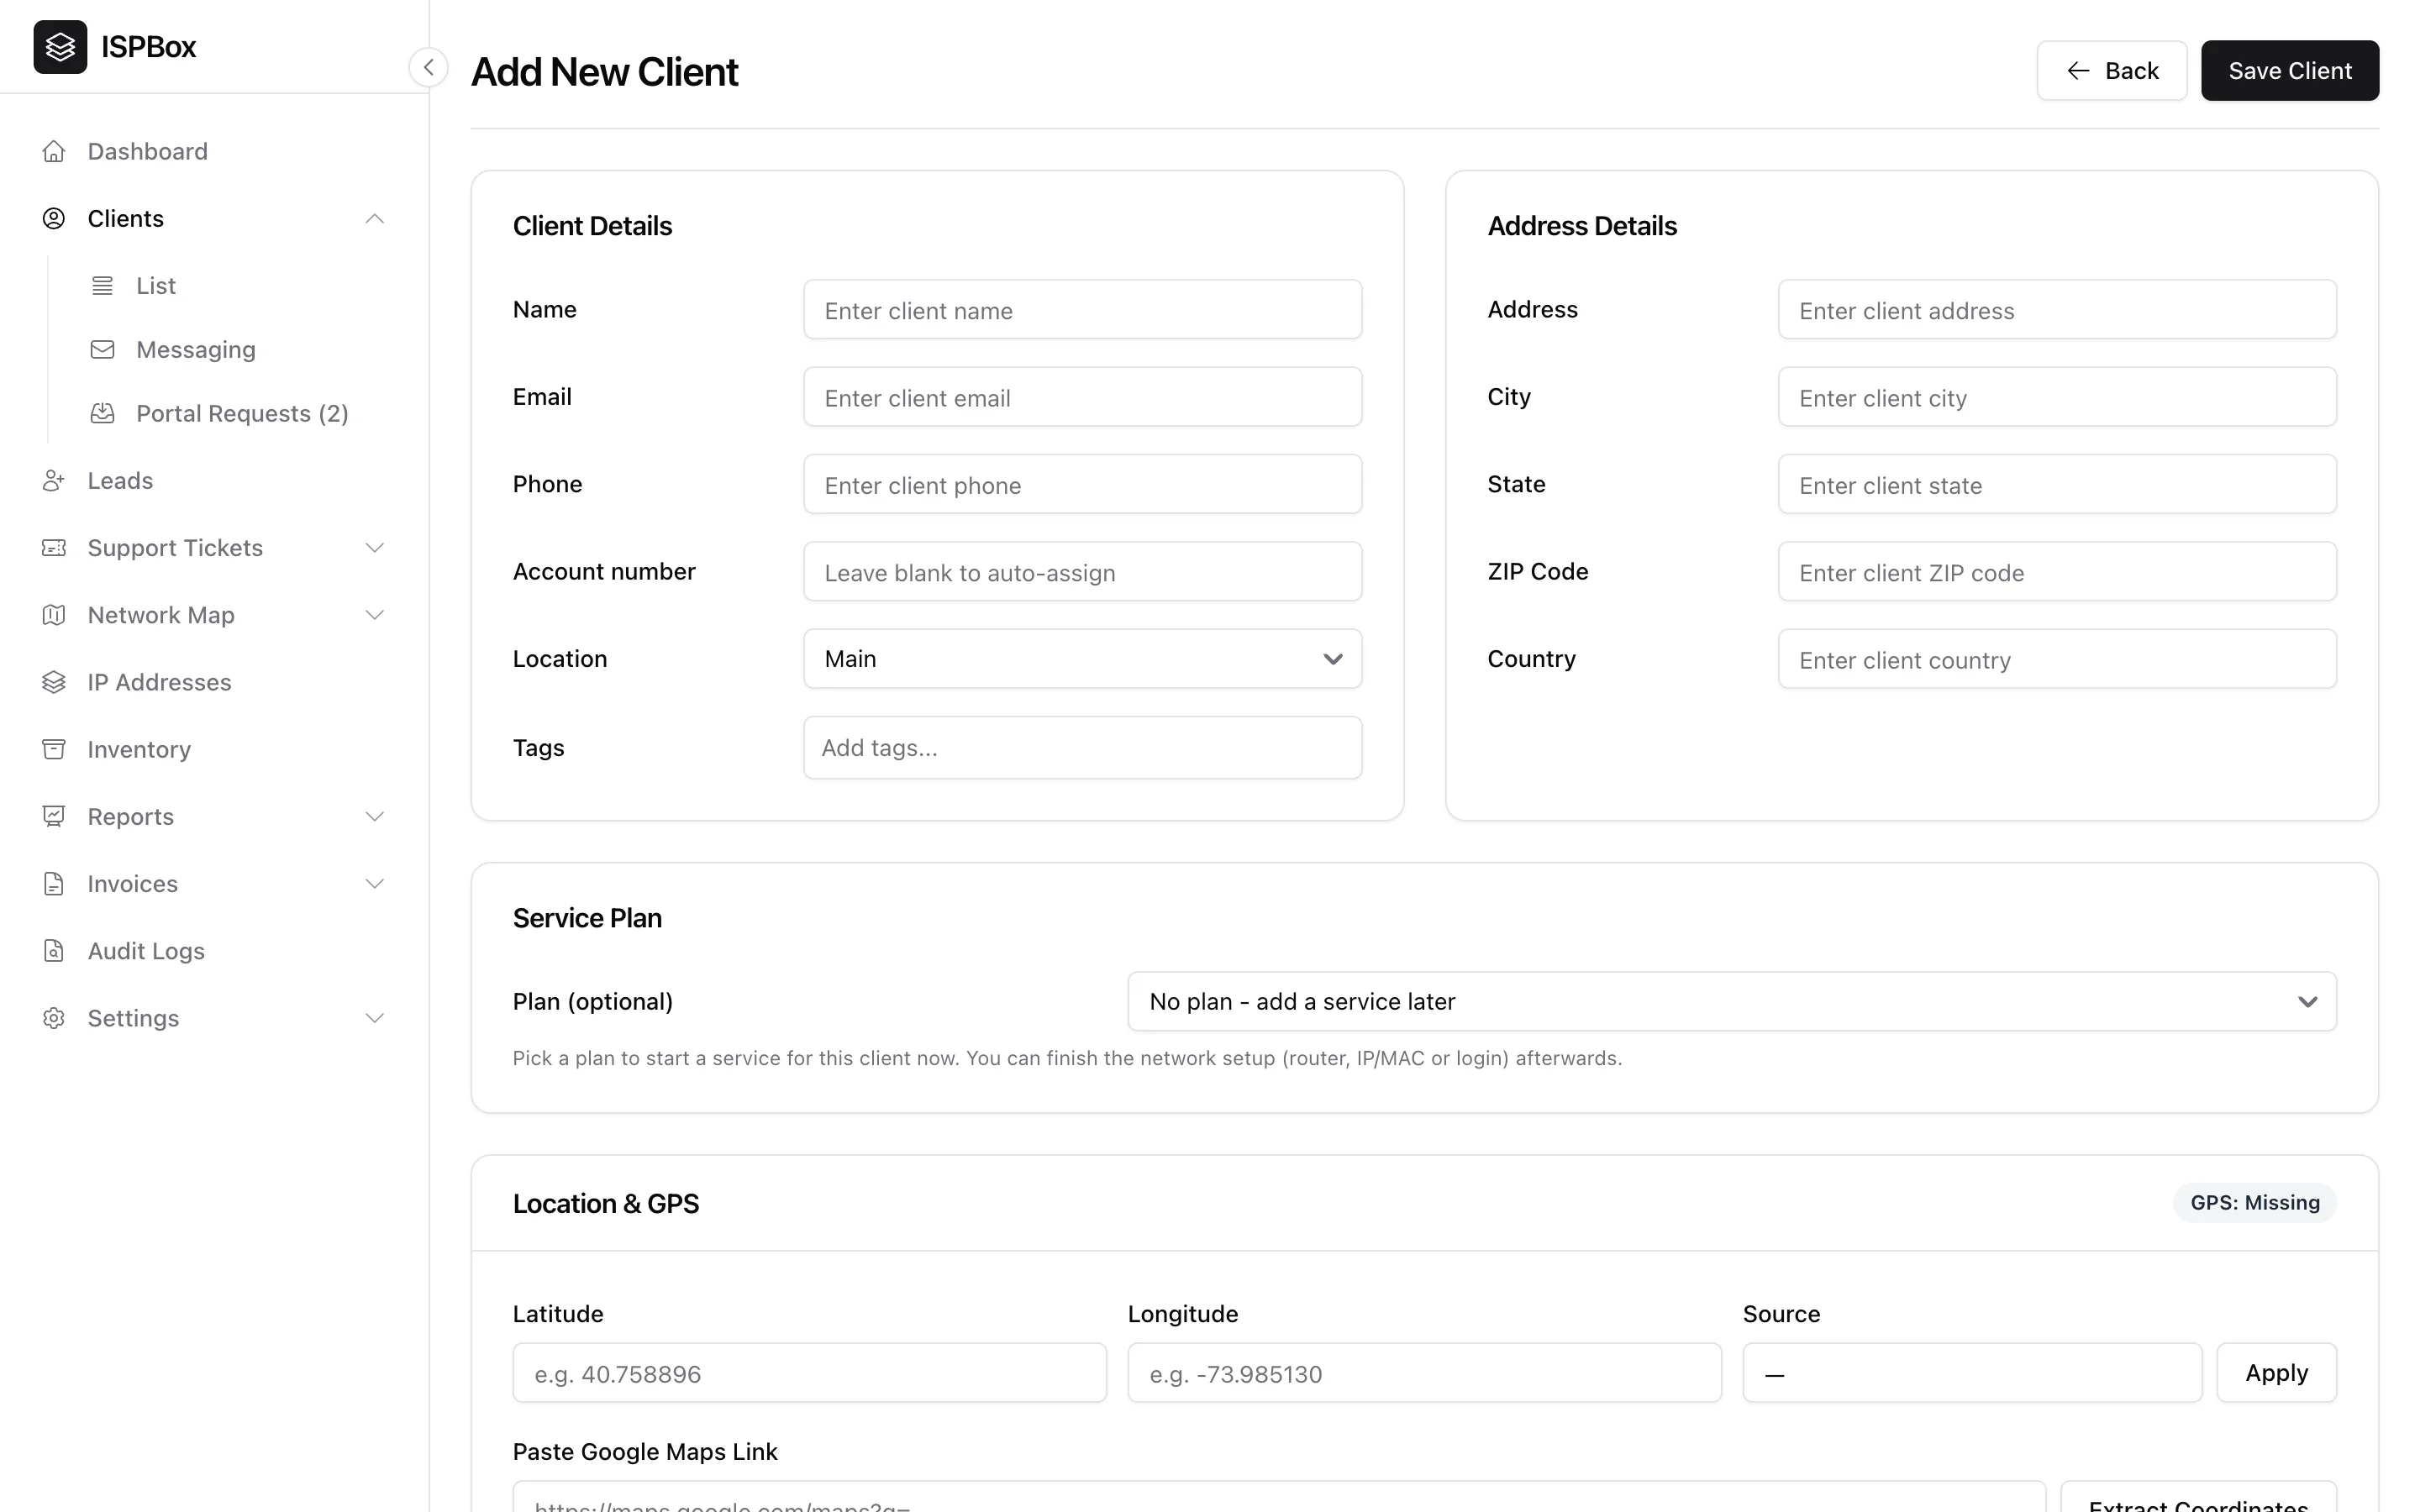
Clients are your customers - the people and businesses you bill and support. Adding one is the starting point for everything else: services, invoices, tickets and the portal all hang off the client record. Open Clients > List and click Add Client (needs the clients manage permission).
1. Client details
Enter the customer's name and contact details (email and phone). The account number can be left blank to auto-assign. Pick their location - the service area they belong to, which drives available plans and reporting - and optionally add tags to flag them (VIP, business, and so on).
2. Address and GPS
Fill in the service address (address, city, state, ZIP, country). You can also set precise GPS coordinates - type them, or paste a Google Maps link and let ISPBox extract them. Good coordinates make the customer show up correctly on the network map and help the team calendar plan field visits.
3. Start a service now (optional)
Under Service Plan you can pick a package to start a service for this client immediately - or leave it as "no plan" and add a service later. If you pick a plan now, you finish the network setup (router, IP/MAC or login) afterwards.
Click Save Client to create the record. From the client's profile you can then manage their services, billing, tickets, documents and portal access.